Easy stand mixer pizza dough - With simple pantry ingredients, you can now whip up a pizza dough in no time using your trusty stand mixer!
The original recipe was published on November 28, 2018, and updated on July 12, 2021.
Pizza is a popular menu in my household since it's something my husband and I can both enjoy. I have a pizza dough recipe that does NOT require a stand mixer (pizza dough recipe by hand). But if you rather spend your energy eating the pizza rather than kneading the dough, this recipe is for you 😉
Why this recipe works
- Simple ingredients – water, sugar, active dry yeast, all-purpose flour, and salt.
- Minimum effort – All the kneading will be done by your trusty stand mixer!
- You can make it ahead - Pizza dough will keep in the refrigerator for 3 days and freezer for up to 3 months.
How to make pizza dough using a stand mixer
- Dissolve sugar in lukewarm water and bloom your yeast in a bowl.
- Mix the flour and salt in a stand mixer bowl.
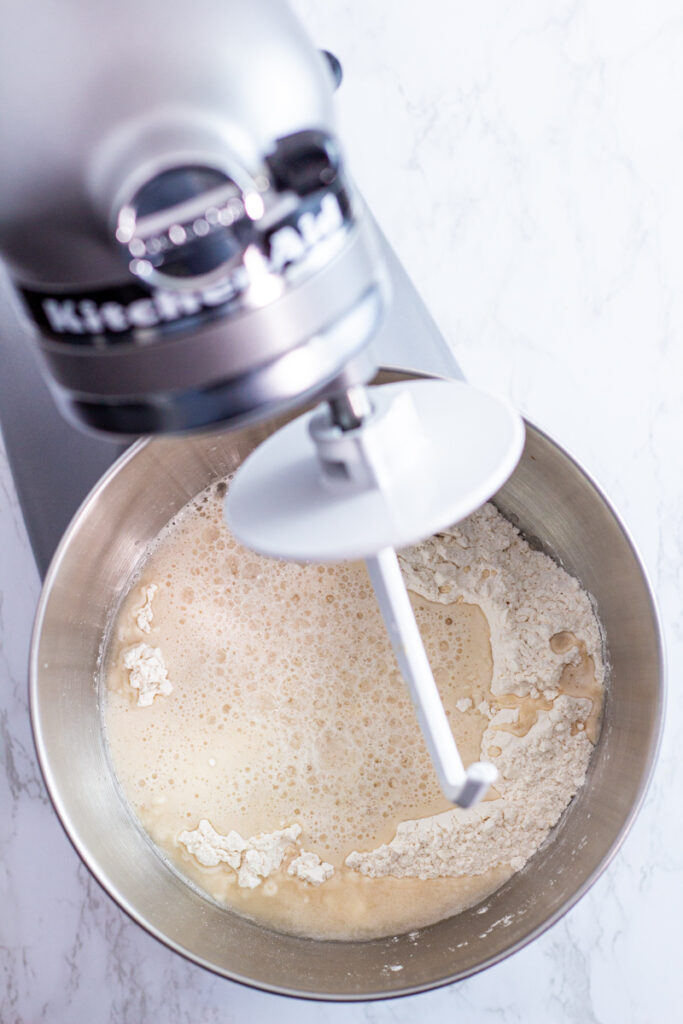
- Add the yeast mixture (wet ingredients) to the flour mixture (dry ingredients).
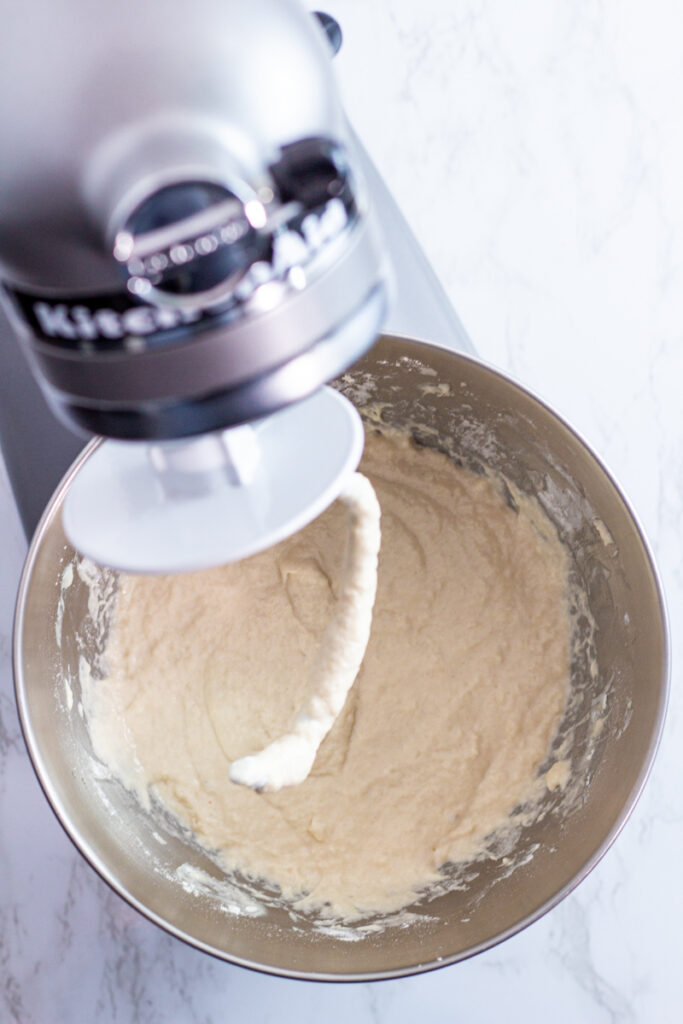
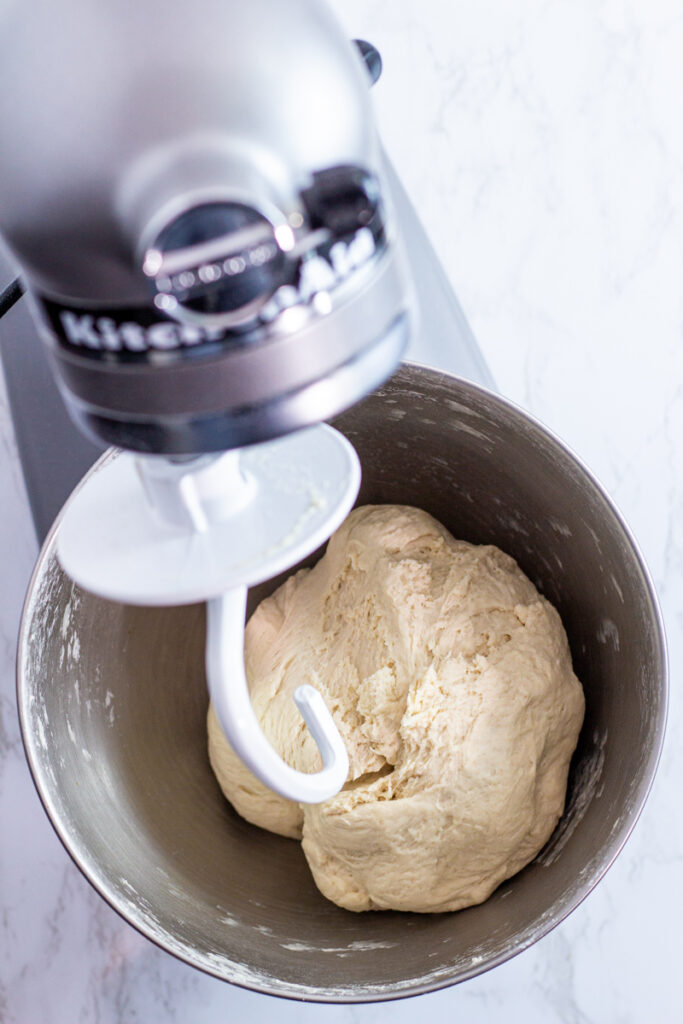
- Let the stand mixer knead the dough until it comes together and the surface appears to be smooth.
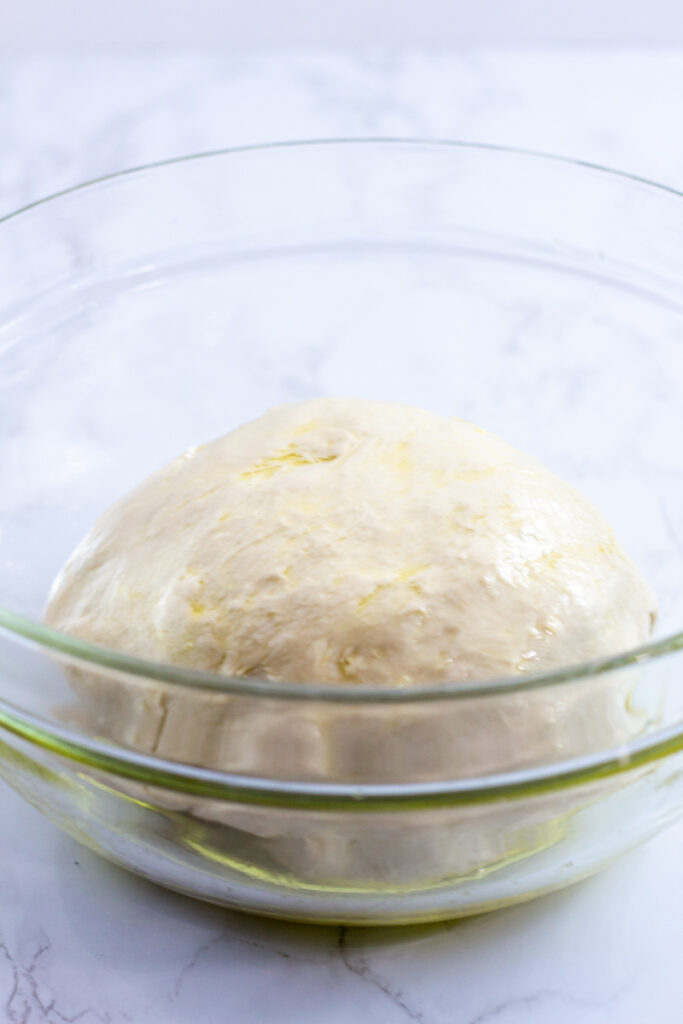
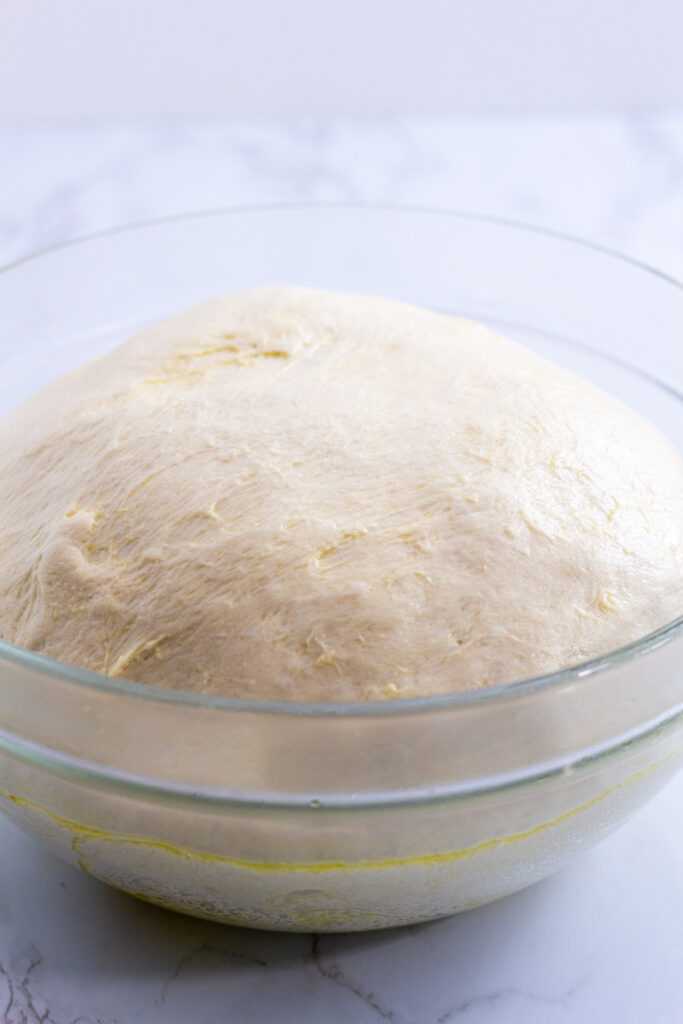
- Transfer the dough in a large bowl and coat with olive oil.
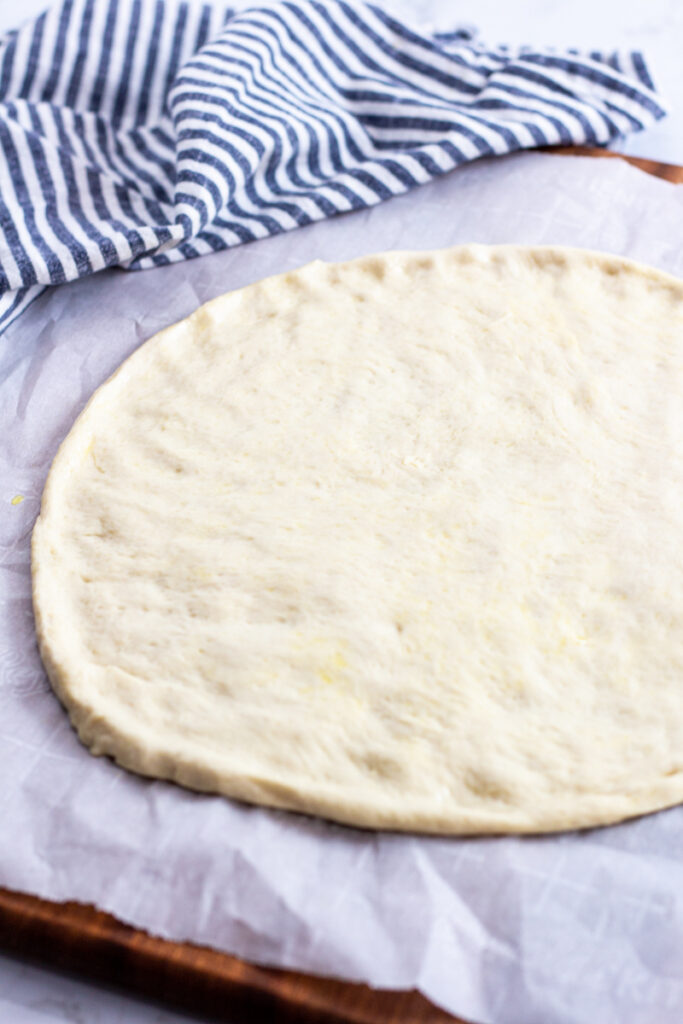
- Let the dough rise until it doubles the size and uses in any pizza recipe of your choice!
Frequently asked questions (FAQ)
Active dry yeast is the yeast that needs to be "bloomed" in water. And instant yeast is the yeast that you can add directly to your dry ingredients and requires no blooming.
It is difficult to say the exact time. Rather than giving you the exact time of the kneading in the stand mixer, you should look for several signs.
There should be no dry ingredient present in the dough.
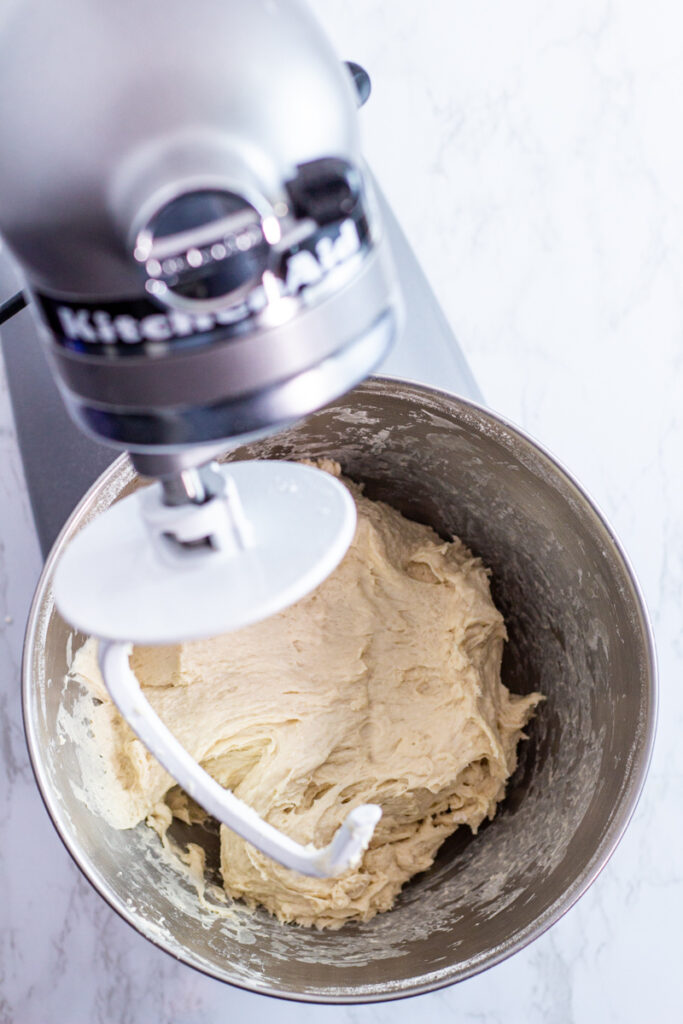
The dough should pull away from the side of the bowl (see the photo below), leave it clean, and collect onto the hook.
Also, the feel of the dough is something you should check as well. The dough shouldn't be too sticky (This means it has too much water. Add a little more flour) or too dense (This means the dough is too dry. Add ½ tablespoon of water at a time and continue to knead in the stand mixer). 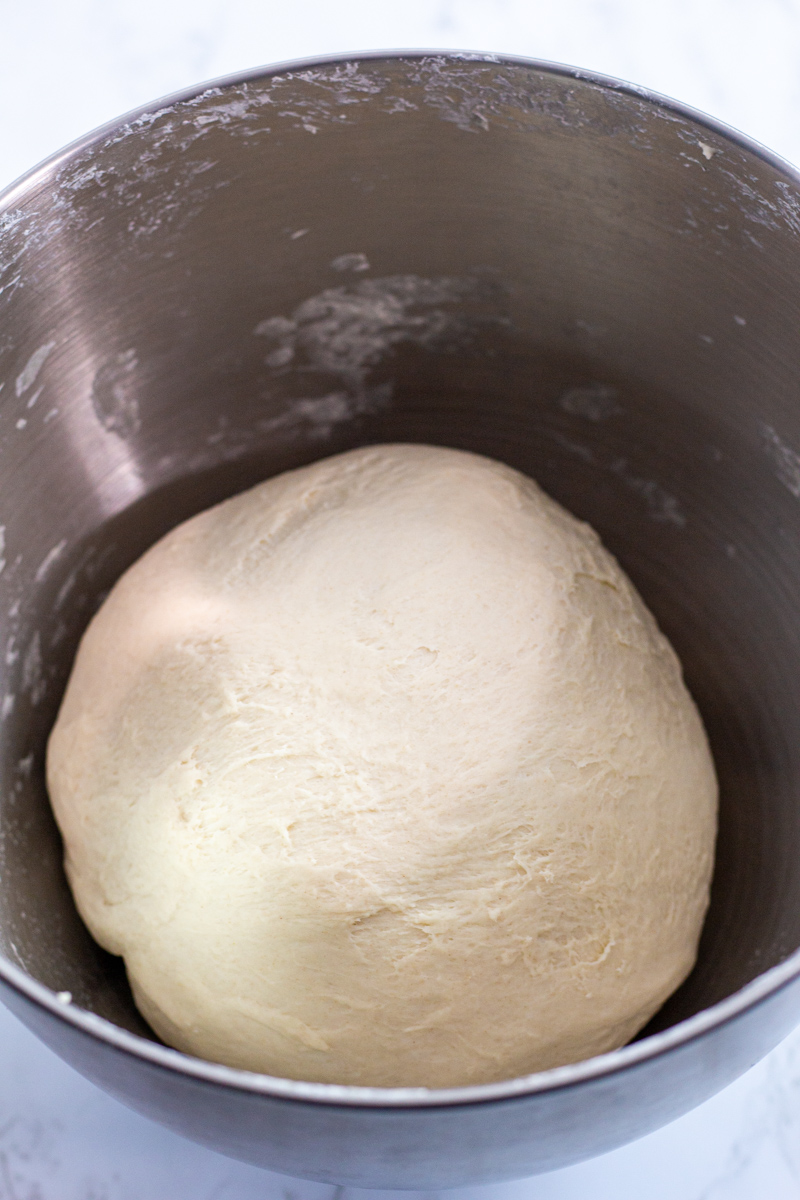
I usually let the dough rise until it doubles in size. During the warm weather, it takes about 45 minutes to an hour but it may take longer during the colder month. The easiest way to test is to gently press the dough with your index finger until your first joint disappears into the dough. If the indentation in the dough remains after you remove your finger, the dough is ready (see photo below).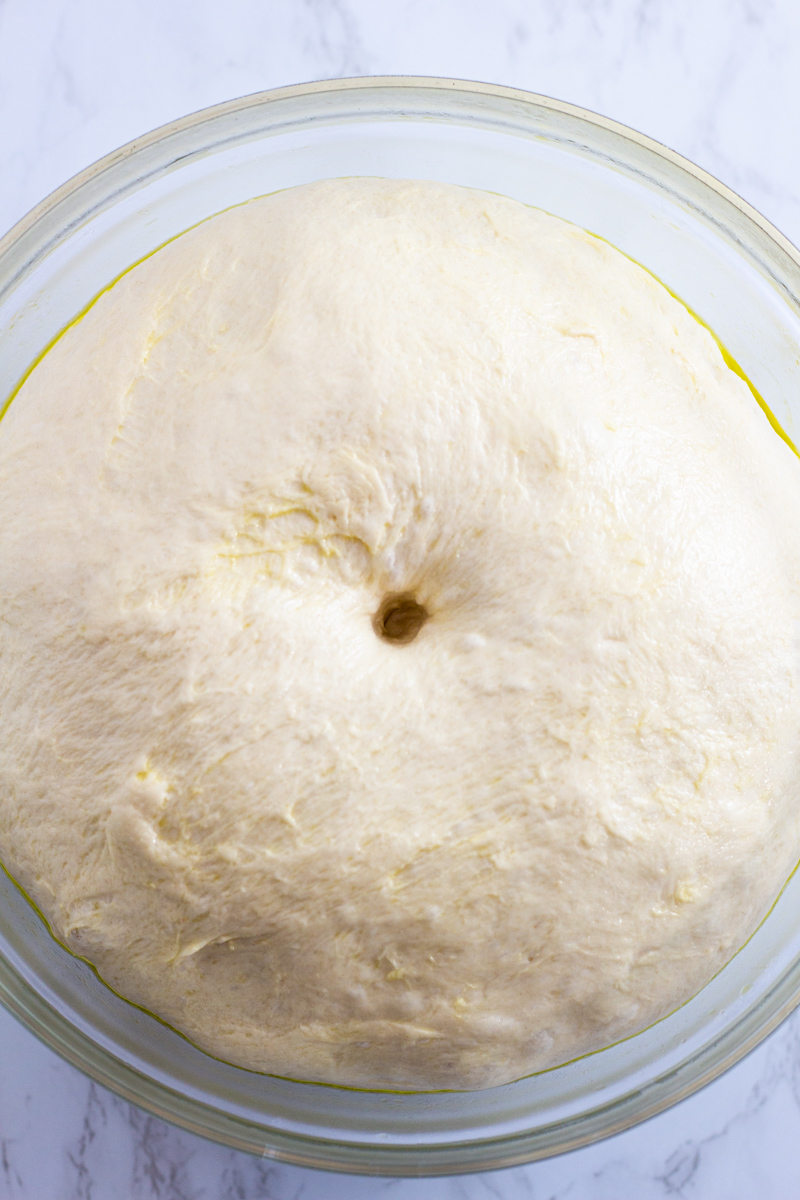
What type of stand mixer should I get?
I had a brief phase where I was very into baking. And during this time, kneading the dough and making cookie dough got a little too much so I decided to get a stand mixer. That being said, if you bake often, I think it is worth upgrading your electric mixer to a stand mixer. However, I don't believe that a stand mixer is a necessary item in the kitchen.
But if you thinking to get one and looking for a recommendation, I have Kitchenaid Classic Plus Stand Mixer and am very happy with the purchase. My runner up choices were:
But for this recipe, any stand mixer will work.
Helpful tips
- To make the "perfect" lukewarm water, I mix boiling water and cold filtered water in a ratio of 1:2. For example, to prepare 2 cups of lukewarm water, I mix ⅔ cup of boiling water in a 2 cup size measuring cup and fill the rest with cold water. I like to dissolve my sugar in boiling water first and add cold water.
- Make sure to use a hook attachment for making the pizza dough.
- When mixing the dry ingredients and wet ingredients, I like to start with 2 cups of dry ingredients in the mixing bowl. Then add the yeast mixture. Once they are mixed, I gradually add the rest of the dry ingredients. When adding the flour, always start your stand mixer with the lowest setting. This will prevent your flour to go everywhere and create a big mess.
- Once the dough has formed in the stand mixer, grab a large size bowl and add some olive oil to the bottom. Transfer the dough into the bowl and coat it with olive oil by rolling the dough into the bowl. Then cover the bowl with plastic wrap or a kitchen towel so the dough won't dry out while rising.
- If you want to add flavor to your dough, do so after the dough has risen. For example, if you want garlic flavor dough, brush the dough with garlic butter after the dough has risen. Adding garlic and other seasonings will slow down the rising time.
- If you are making the dough a day before, you can let the dough rise in the refrigerator overnight (this is referred to as cold-proving or cold rising).
How to store pizza dough
I like to keep my leftover pizza dough in a gallon-size, freezer-safe plastic bag. The dough will continue to rise even when you place them in the fridge. So I like to place my dough in a large-size bag to give it enough room to rise. Plus, the plastic bag will help prevent the dough from drying out.
- The fresh dough will keep in the refrigerator for up to 3 days.
- The dough will keep in the freezer for up to 3 months.
If you freeze your dough, you can place the frozen dough in the fridge overnight to thaw or place them on a countertop until it thaws completely. Make sure your dough is covered completely so it won’t dry out.
Don't have a stand mixer? No worries!
If you don't have a stand mixer, that doesn't mean you can't make delicious pizza dough at home. Here is an easy pizza dough recipe without a stand mixer!
Looking for delicious pizza recipes?


Easy stand mixer pizza dough
With simple pantry ingredients, you can now whip up a pizza dough in no time using your trusty stand mixer!
- Prep Time: 75 minutes
- Total Time: 1 hour 15 minutes
- Yield: dough enough for 2 large pizza
- Category: Main course
- Method: Knead
- Cuisine: American
- Diet: Vegan
Ingredients
- 2 cups warm water
- 1 tablespoon sugar
- 1 tablespoon active dry yeast
- 4 and ½ cups packed all-purpose flour (Please see NOTE below)
- 2 teaspoons salt
- 2 tablespoons extra virgin olive oil
Instructions
- In a 2-cup size measuring cup, dissolve 1 tablespoon of sugar in ¾ cup of boiling water. Once the sugar is dissolved, add cold water to make up a total of 2 cups (this method will yield lukewarm water). Add the active dry yeast. Let it sit for 5-10 minutes until they are foamy and bloomed.
- While waiting for your yeast to bloom, mix together the flour and salt in a large bowl so the salt will be evenly distributed (Please see the note below for the flour measurement).
- Attach the dough hook to a stand mixer.
- Add 2 to 3 cups of the flour mixture in a stand mixer bowl and pour in the yeast mixture. Mix at a low speed until they are well incorporated. The mixture will resemble a wet batter.
- Add the rest of the flour mixture (½ cup of the flour mixture at a time) and continue to knead the dough on a low-speed setting. Make sure to use the lowest setting each time you add the flour. If you were to use the higher speed setting, the flour will go everywhere and make a mess. You may have to scrape the side of the bowl a couple of times to get everything well mixed.
- When you no longer see the dry ingredients, increase the speed to medium and continue to knead the dough. It should pull away from the side of the bowl and leaves it clean and collect onto the hook.
- Once the dough is ready, grab a large bowl and add about 2 tablespoons of extra virgin olive oil. Transfer the dough to the bowl and roll it around so the dough will be completely covered with oil. Cover the bowl with plastic wrap or a kitchen towel and let it rise until it doubles its size.
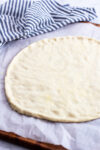
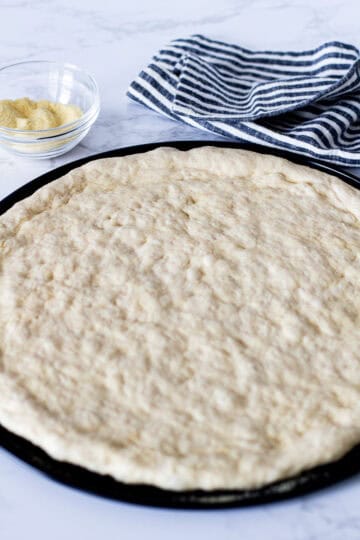
- When the dough has risen, shape it into a pizza form and enjoy.
Notes
- The original recipe was published on November 28, 2018.
- If you were to measure flour correctly, the recipe calls for 5 to 5 and ½ cups of all-purpose flour. However, I tend to pack my flour when measuring. And I find that 4 and ½ cups work perfectly for this recipe.
- To check to see whether your dough has risen enough, you should look for a couple of things. Your dough should double in size. And also, you should test it with your finger. When the dough seems to be double in size, gently push your index finger in the middle of the risen dough. If the indentation remains after removing your finger, your dough is ready.
- The dough will keep in the fridge for 3 days and in the freezer for up to 3 months.
- If you don't have a stand mixer, check out my other pizza dough recipe (by hand, without a stand mixer).


Visa says
I came across your recipe about a year ago, and since I've made this pizza dough every time. I gotta say, it never fails. My family loves homemade pizza only because of this dough. If they gotta choose between homemade or store bought pizza, the choice is always homemade! Thank you very much for this recipe, you've made my family happy!!
George says
Thank you so much, Visa! Your comment truly made my day. I'm so happy to hear that this pizza dough has become a regular part of your family's pizza night. I really appreciate you taking the time to share your experience! Thank you again for your kind words and the 5-star rating.
Nancie Flynn says
Easy to make! Thanks! My question is, do I roll it out or just stretch it on a pan?
My other question is how to build the pizza? Should I put olive oil on crust, then sauce, then cheese, & then toppings?
Thanks so much! First timer here….
George says
Thank you so much for the 5-star review, Nancie! This means a lot to me! 😊
You can either roll the dough out or stretch it by hand, whichever you prefer. I usually stretch it right on the pan since it keeps the crust nice and a little chewy, but rolling works great if you want it thinner.
And yes, your order is perfect! Lightly brush the crust with olive oil first (you can even mix in a little salt or herbs for extra flavor), then add the sauce, cheese, and toppings. You’re doing amazing! Homemade pizza nights are so much fun!
Heather says
First time using my stand my. Excellent recipe and easy to follow. Appreciated the tips section. My new go-to pizza dough recipe!
George says
Hi Heather! I’m SO glad to hear this turned out well for you 😊 It makes me really happy to know the tips were helpful and that the dough has earned “go-to” status in your kitchen. Thank you for taking the time to leave such a kind review. Happy pizza making! 🍕💛
Kimberly Steele says
Just made this tonight and it came out perfectly. Soft yet crisp. It was very easy to flatten before baking. I especially appreciate the note about yeast and how to get the recipe started by dissolving the sugar and then adding water to the yeast brew.
I don't use my stand mixer enough so this is a good reason to use it more often. Thanks for this wonderful recipe. My husband's favorite food is pizza and he was in seventh heaven.
George says
Kimberly, that means so much to me! Thank you so much for your kind words and review. I am so glad your husband and you enjoy this recipe 🙂
Coby- Australia says
Thank you, this was a light and fluffy dough and so easy to put together with your instructions. I’d previously had trouble with the dough not rising properly. And thanks for the great tip on dissolving the sugar first.
George says
Hi Coby,
Thank you so much for your kind words and review! I'm so happy to hear that the recipe worked out for you!:)
Margot says
Attempting this recipe today... couple of notes... was definitely really disappointed, like another reader, to find the tiny note at the bottom that the flour measure was different.
Something that might be helpful to include if updates are made to the recipe... add a reference number for the mixer aka medium = 2,4,6 etc on a standard kitchenaid and an estimate on how long on the knead setting.
Hoping I was able to save the dough because as of right now, as the recipe stands, I have a flop on my hands.
George says
Hello Margot,
Thank you so much for your feedback and I'm sorry to hear that the dough didn't turn out good for you.
I will make small change in the recipe so that it will be easier for the readers to see the flour measurement. And I will have in mind to include mixer speed in the future. Once again, I really appreciate your feedback!
Laurie says
How many single calzones will i get out of this?
George says
It depends on the size of your calzone. But I think you would be able to make 4 since it would make 2 nice size pizza with this dough. Hope this helps, Laurie!
Beth K says
Every Friday night is pizza night in our home and this is now our go-to dough recipe. It is easy, delicious and versatile. I appreciate the ratio of boiling vs cold water to get the perfect temperature water to bloom yeast. I typically throw in some spices/herbs (garlic powder, basil, oregano, etc.) in with the flour. We use a pizza stone and bake our pizzas for about 10 minutes at 500 degrees. Also, used the dough to make breadsticks last night (coated with butter and garlic salt) and they were yummy! Thank you for the great recipe 🙂
George says
Hi Beth, thank you so much for your kind words and review! I'm so happy to hear that you are enjoying the recipe. I also appreciate how you share great ideas! I love your breadstick idea and am totally going to steal that 😉
Noreen says
This recipe is amazing. Just made it again. My now go to pizza dough recipe!
George says
Thank you so much, Noreen. I'm so happy to hear you are enjoying the recipe!
Sherri says
What speed on the mixer do you use with the dough hook and about how long do you mix?
George says
Hi Sherri,
I start my mixer on low speed so that I'm not covered in flour, haha. Once everything seems incorporated, I increase the speed to medium (for my Kitchen Aid, I use setting 4 - 6) and let it knead with the dough hook for 5 to 7 minutes until the dough comes together and appears to be smooth. I hope this helps!
Jamie says
*If you were to measure flour correctly, the recipe calls for 5 to 5 and ½ cups of all-purpose flour. However, I tend to pack my flour when measuring. And I find that 4 and ½ cups work perfectly for this recipe*
I have to say I was very annoyed when finding your little note ^ This was my first time making this recipe so I read the recipe in its entirety before starting (so I thought) I didn't see this ridiculous note until I was completely finished and had placed the plastic wrap on my dough. I have never seen a recipe where someone gives the incorrect flour measurements because the author can't measure flour correctly. Now that I have completed this recipe I'm more than annoyed to find that I am 1 to 1 1/2 cups short on flour because I correctly measure flour like everyone else who cooks & bakes. In the future how about just putting the correct measurements in the ingredients list and leave your quirks out.
George says
Hi Jamie, thank you for your comment. Most people I know (novice cooks) tend to just stick the measuring cup in the flour bag and level (the way I described in the recipe) rather than fluff the flour, spoon them, and level them (the correct way of measuring flour). My hope is to share recipes that are easier for people who are not advanced cooks and professional chefs. But I realized that it can cause confusion. I'll have this in mind and try to provide measurements in grams as well in the future. Thank you for your feedback!
Tina Ray says
Dear George,
I haven’t made this pizza dough yet, but I am going to try it out because it looks amazing, but mainly because I APPRECIATE the way you responded to a very mean-spirited comment with grace and kindness.
Also, thank you for replying to each comments - snarky or not. So many food bloggers don't bother to answer questions or comments.
I will be following your posts!
Now - off to try your recipe! 😋
~ Tina
George says
Tina,
Thank you so much for your kind words. You have no idea how nice it is to get a comment like this 🙂
Regardless of my feelings, if the comment provides any value to other readers, I try my best to address them.
Once again, thank you so much, and hope you like the recipe!
Lori says
Wow. Just wow. You are seriously rude for someone who is getting a free recipe and one that cost less than $5 to boot. I had no problem finding and the content of it. In fact I appreciated it because flour amounts can be off depending on how people measure it. I'm sorry you missed it but next time try offering some constructive criticism, like "it would have helped if you brought more attention to the note", or placed that info with the instructions.
Neisha says
I made this pizza dough last night and OH YUM!!! It is absolutely the best! I used my big sheet pans and it made an awesome thin crust for our pizzas. I will now be using this recipe all the time.
George says
Yay!! I'm really happy to hear that! Thank you so much for your review, Neisha!
Carol Addison says
This was my 1st time making pizza dough and I have to say it turned out amazing! I only have 1 pizza stone so I just used cookie sheets for the other 2 and they were just as good as the one with the stone. Definitely a saver!
George says
Hi Carol! I'm so happy to hear that it turned out great! Yay!!! I really appreciate your review!
Nicole says
About how long does it take for the dough to rise?
George says
Hi Nicole, it depends on several factors such as the temperature of your place for the dough to rise. So instead of giving you a set time, I'd like to say until the dough double the size. It usually takes me about 45 minutes to an hour. You can also let it rise in the refrigerator overnight and use the dough next day. Hope this helps!
Laura says
If i put dough in the fridge,when i go to use next day, it has already rose correct? So i dont need to let it rise again right? Just rollout and use.
Ive made this alot but never did the fridge method and i plan to make alot of pizza for mothers day
George says
Hi Laura,
You can put the dough in the fridge after rising. You can simply cover your dough (leave it in the bowl and cover it with plastic wrap) so that it doesn't dry out.
When you are ready to make the pizza, take your dough out of the fridge and let it come to room temperature (about 1 hour), and proceed to make the pizza (roll out the dough and put sauce and toppings).
If your dough still feels a little cold to tough after 1 hour, it is okay. I hope this helps 🙂
Thank you very much for your review and hope you have a wonderful Mother's day, Laura!
Heidi says
I just made this dough and realized there is no baking directions?
George says
Hi Heidi! Because the recipe is for making the dough itself, I didn’t include the cooking time but I realize that I should. I will include the baking direction shortly. Meanwhile, when I make my pizza using this recipe, I bake my pizza (after adding sauce and toppings) at 450 for 11 to 15 minutes. Hope this helps 😊
Lisa says
We love it ! I have a friend though that needs gluten free? Is it simple to change flour to gluten free for them?
George says
Thank you so much, Lisa!! I have not had a chance to experiment with gluten free flour. But this one seems to have an excellent review: https://www.glutenfreepalate.com/gluten-free-pizza-9-ingredients/. Hope this helps! Once again, thank you so much for your review 😊🙏🏻
Melony Reid says
Can you freeze the dough?
George says
Hi Melony,
Yes, you can freeze the dough! I do it all the time.
Place dough in a freezer-safe bag, get as much air out as possible and store it in the freezer. It lasts about a couple of months in the freezer.
When you are ready to use it, just thaw it out and use it as it's fresh dough! Let me know if you have any other questions!
Kayla says
Do you refrigerate or freeze AFTER the dough has risen or before?
Thanks !
George says
Hi Kayla! You can do both! If you want to make your pizza the next day then you can leave it in the fridge before the dough has risen. It will still rise slowly and it should be ready by the next day. I personally like to freeze my dough after it has risen and keep them in freezer safe bag and keep in the freezer. Hope this helps!
Dee says
Does the dough, need to rise first, before freezing it?
George says
Hi Dee, yes I let the dough rise first then freeze it. If you are in a rush, you can let the dough rise in the refrigerator overnight. This will help the dough rise slowly in a colder environment. Then in the morning, you can transfer the dough into a freezer-safe bag and freeze it. I hope this helps!
Barb says
Do you have instructions for making it without a mixer?
George says
Hi Barb,
Here is a pizza dough recipe without using a stand mixer:
https://www.myeclecticbites.com/easy-pizza-dough-recipe-without-a-stand-mixer-with-active-dry-yeast/
Hope this helps and let me know how it turns out!
Chip says
Hi George! This will be my first attempt at trying to make fresh dough. The recipe looks very easy to follow the way you have instructed. My question, can I halve the recipe? It's just the two of us and if I read correctly, this makes two pizzas. If not, you did mention refrigerating and/or freezing. Thanks for a well explained recipe.