Beginner-friendly sourdough starter maintenance with my daily log, feeding notes, and practical tips for caring for your own starter.
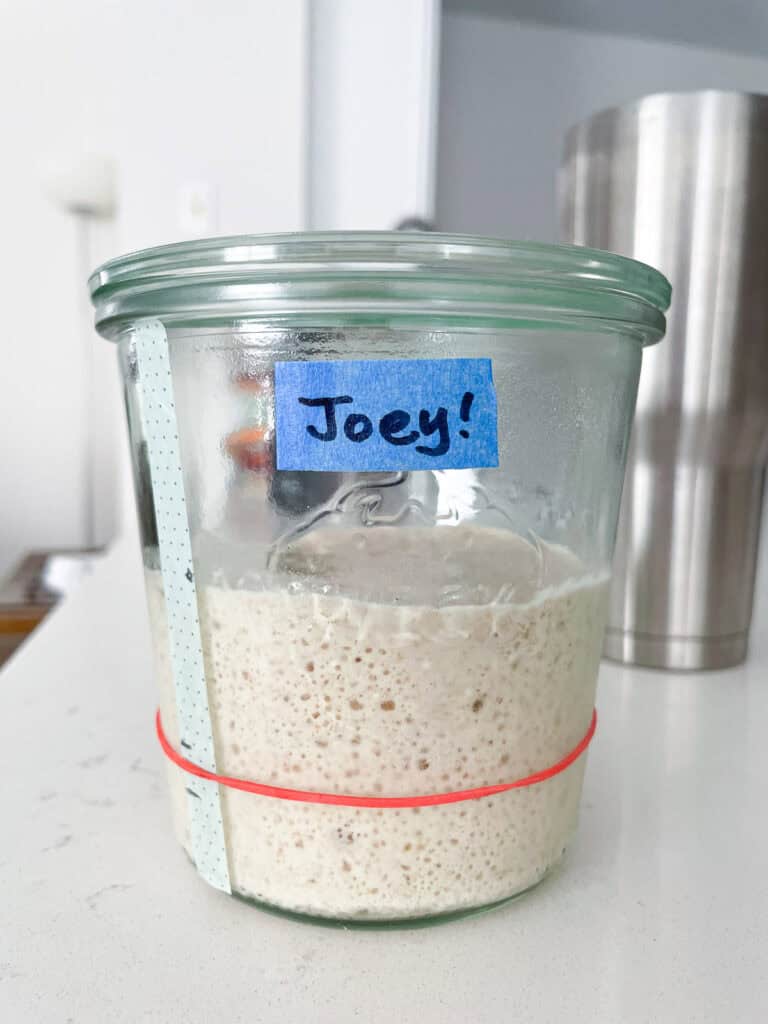
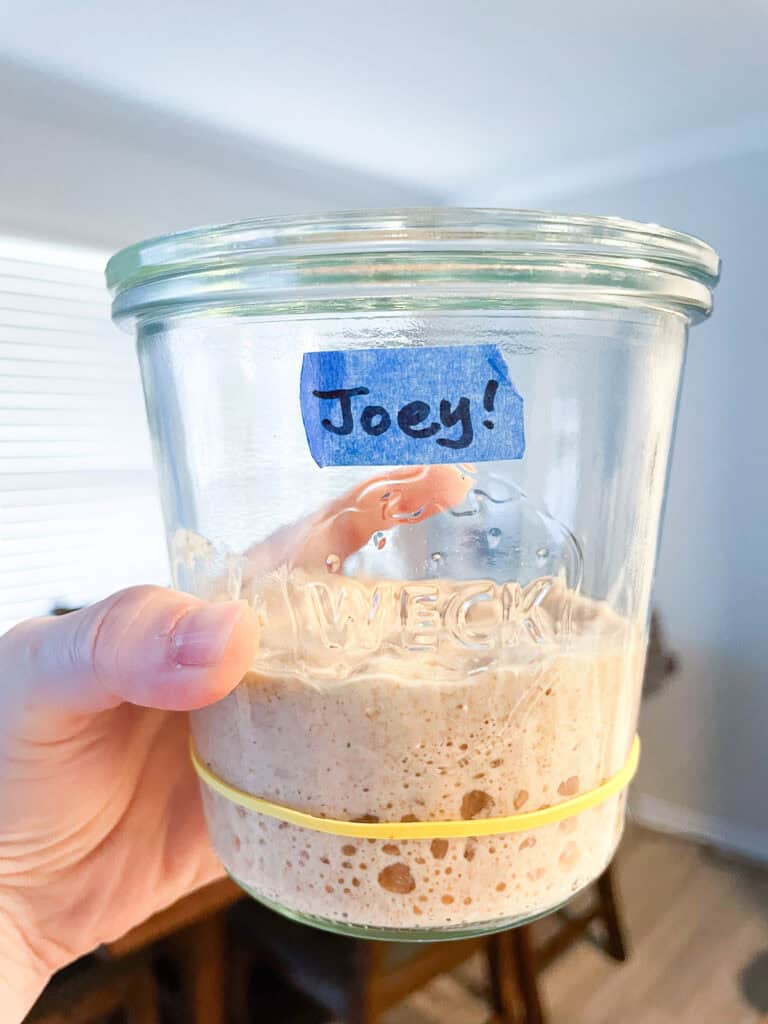
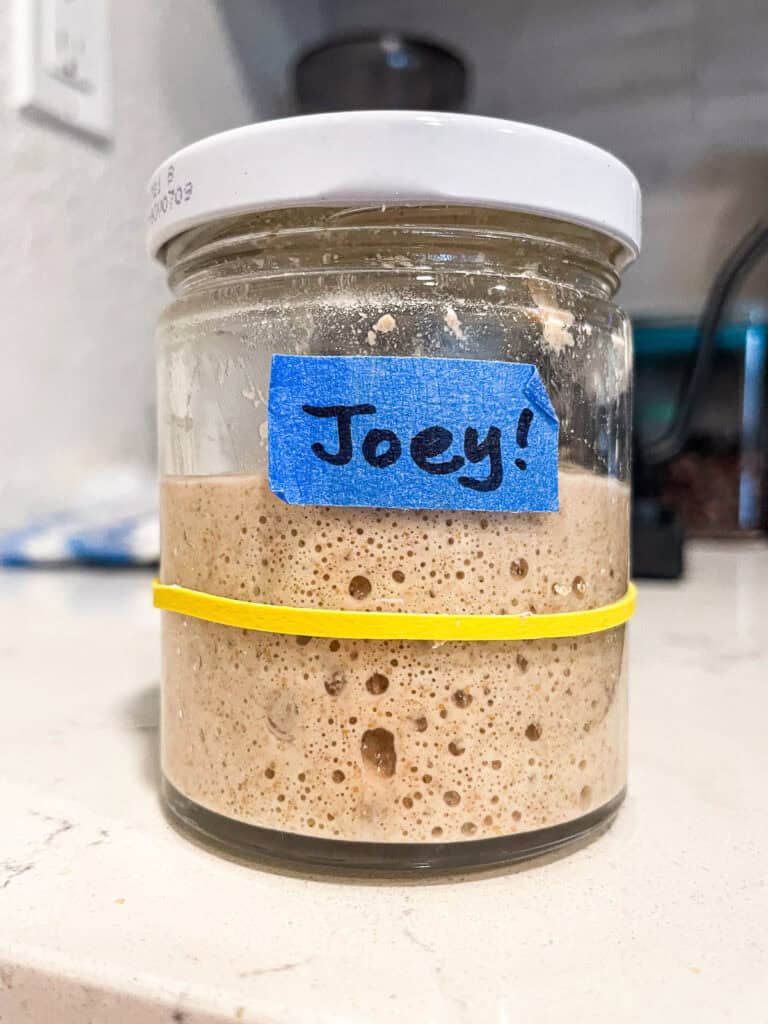
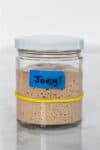
I created my starter, Joey, from scratch. After I almost "killed" a friend's starter (read my full story here), I began this daily log to track every change, making it easier to notice patterns and troubleshoot. This log is the result.
While I started with The Sourdough Whisperer's method, I quickly learned to adjust and follow my intuition. This log isn't a rigid guide—it's a resource to give you comfort, show you what a real process looks like, and provide troubleshooting help for your own journey.
Jump to:
- How to Make Your Own Starter
- How to Read This Log
- Active Growth Phase of My Sourdough Starter (Day 1 - 15)
- Early Activity Phase (Day 1 to Day 5)
- Strength Building Phase (Day 6 to Day 10)
- Consistent Growth Phase (Day 11 to Day 15)
- How to Know When Your Starter Is Ready
- What I Learned
- Sourdough Starter Maintenance Phase
- How to Build the Amount You Need
- How to Make and Maintain a Sourdough Starter
How to Make Your Own Starter
I originally planned to follow the method from The Sourdough Whisperer, which walks you through a simple eight-day process. I did follow this as a starting point, but I also leaned on my intuition and adjusted as I went. This is the foundation I began with, and it’s a great place for any beginner to start.
| Day | Feed / Action |
|---|---|
| Day 1 | 50g flour + 50g water (room temp, 24 hours) |
| Day 2 | Add 30g flour + 30g water (room temp, 24 hours) |
| Day 3 | Add 30g flour + 30g water (room temp, 24 hours) |
| Day 4 | Remove half, add 30g flour + 30g water (room temp, 24 hours) |
| Day 5 | Add 30g flour + 30g water (room temp, 24 hours) |
| Day 6 | Remove half, add 30g flour + 30g water (room temp, 24 hours) |
| Day 7 | Add 30g flour + 30g water (room temp, 24 hours) |
| Day 8 | Check if starter is ready. If not, repeat from Day 4 |
How to Read This Log
Every starter is different. Starters have their own personality, their own pace, and their own way of telling you what they need. This log is here to help you notice patterns, stay curious, and understand the small shifts that happen along the way.
- Feed: What I added to Joey (for clarity: BF = bread flour, WWF = whole wheat flour).
- Height: How much he grew after a feeding.
- Smell: Something easy to notice and helpful when things feel off.
- Texture: Another simple visual cue that made tracking his changes easier.
- Notes: Anything I adjusted or wanted to remember for later.
Active Growth Phase of My Sourdough Starter (Day 1 - 15)
This is the period where Joey came to life. I like to think of it in three parts: the early activity stage from Day 1 to Day 5, the strength-building stage from Day 6 to Day 10, and the consistent growth stage from Day 11 to Day 15. Each one felt very different, so I’ve broken them into their own sections below for easy reading.
Early Activity Phase (Day 1 to Day 5)
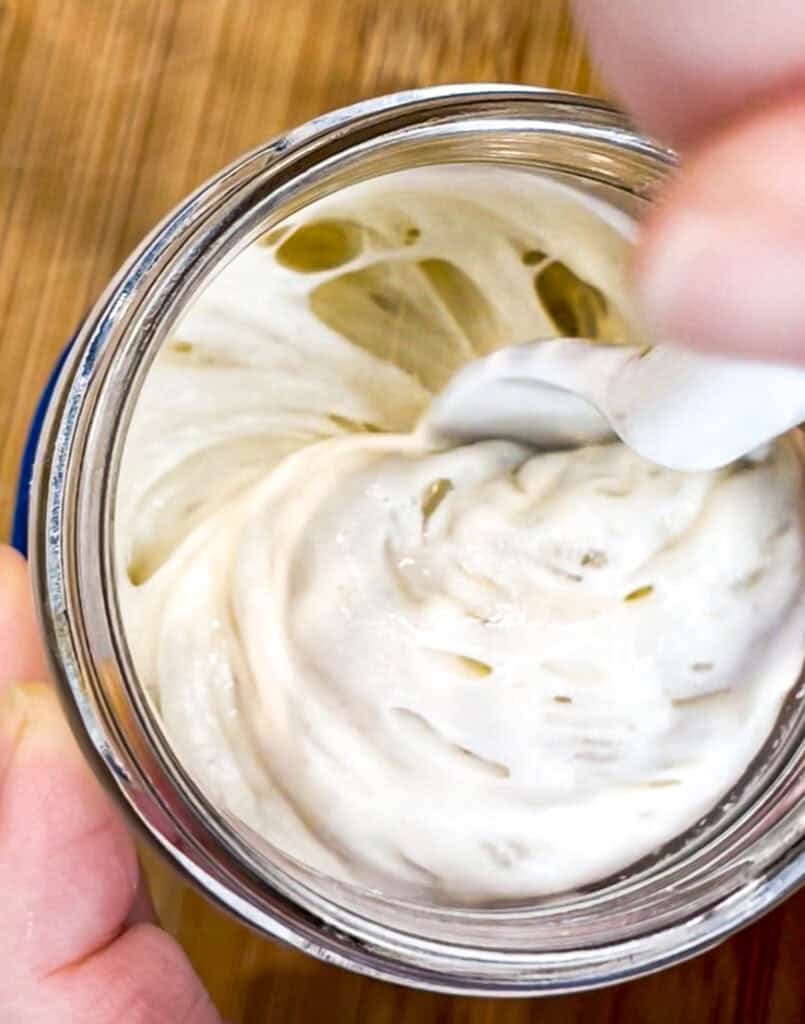
- Activity felt very unpredictable. In the beginning, nothing happened, and then all of a sudden it rose and collapsed. I later learned this is often called the “false start,” when non-yeast bacteria bloom for a moment and make it seem like your starter is ready. The false start was also the culprit for that unpleasant sour smell.
- The smells and textures were hard to read. It was floury, tangy, and eventually became sour in a way that did not feel pleasant.
- I sometimes saw a bit of liquid forming. I read that I could either pour out the liquid or stir it back in, but since Joey already looked very liquidy at the time, I chose to pour it out.
- Reset: Reducing the amount of starter back to a small portion so it can get a stronger, more effective feed
- Note on Day 5: Joey doubled in four hours and held that height for about an hour. I thought he was ready to bake, so I moved him to the fridge.
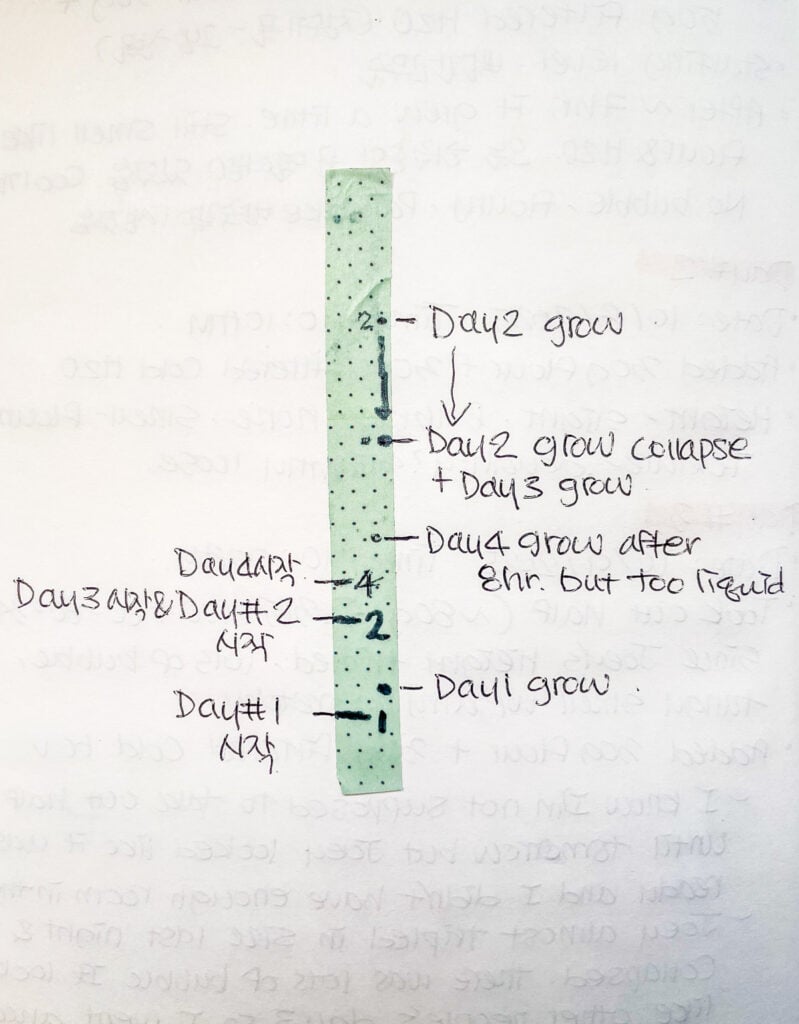
| Day | Time | Feed | Height | Smell | Texutre | Notes |
|---|---|---|---|---|---|---|
| 1 | 11 am | 50g BF + 50g water | None | Floury | Pancake-batter like | - |
| 2 | 10 am | 30g BF + 30g water | Slight dome | Floury | Batter-like, no bubbles | - |
| 3 | 10 am | Removed half, 30g BF + 30g water | Tripled | Tangy | Airy and stretchy, many bubbles | Tripled overnight then collapsed |
| 4 | 9 am | 30g BF + 25g water | 50% growth | Sour & tangy | Airy with many bubbles | Some liquid separation in the middle, Poured out liquid |
| 5 pm | 25g Joey + 30g BF +10g WWF + 30g water | Slight | Sour | Small bubbles, very thin | Became too liquidy/thin so reset to 25g | |
| 5 | 8 am | 40g BF + 10g WWF + 45g water | Tripled | Tangy & sour | Bubbles throughout, airy and stretchy | No sign of liquid |
| 1 pm | - | Doubled | Tangy | Many bubbles | Moved to fridge |
Strength Building Phase (Day 6 to Day 10)
- This stage was the most confusing and frustrating for me because there was very slow or no visible rise.
- Some days the texture looked loose or doughy, so I reset to a smaller amount and gave a fresh feed (Reset: Reducing the amount of starter back to a small portion so it can get a stronger, more effective feed).
- I made little adjustments whenever something felt off, changing the feed as needed.
- This part really required patience. As long as I didn’t see any mold, I kept going and trusted that Joey was working behind the scenes, even when he looked completely dormant.
| Day | TIme | Feed | Height | Smell | Texture | Notes |
|---|---|---|---|---|---|---|
| 6 | 9 am | 48g BF + 12g WWF + 50g water | 150% total | Tangy | Many bubbles | Grew more in the fridge, then left it at room temp |
| 5 pm | (none) | None | Faint tang | Slightly loose, no bubbles | No growth | |
| 5 pm | 25g Joey + 40g BF + 10g WWF + 45g water | None | Floury | No bubbles | Reset to 25g | |
| 7 | 9 am | 45g Joey + 45g BF + 45g water | Slight dome | Slight tang | Slightly loose | Reset again, kept 45g |
| 2 pm | 5g WWF | None | Slight tang | None | Added a little WWF because it seemed loose | |
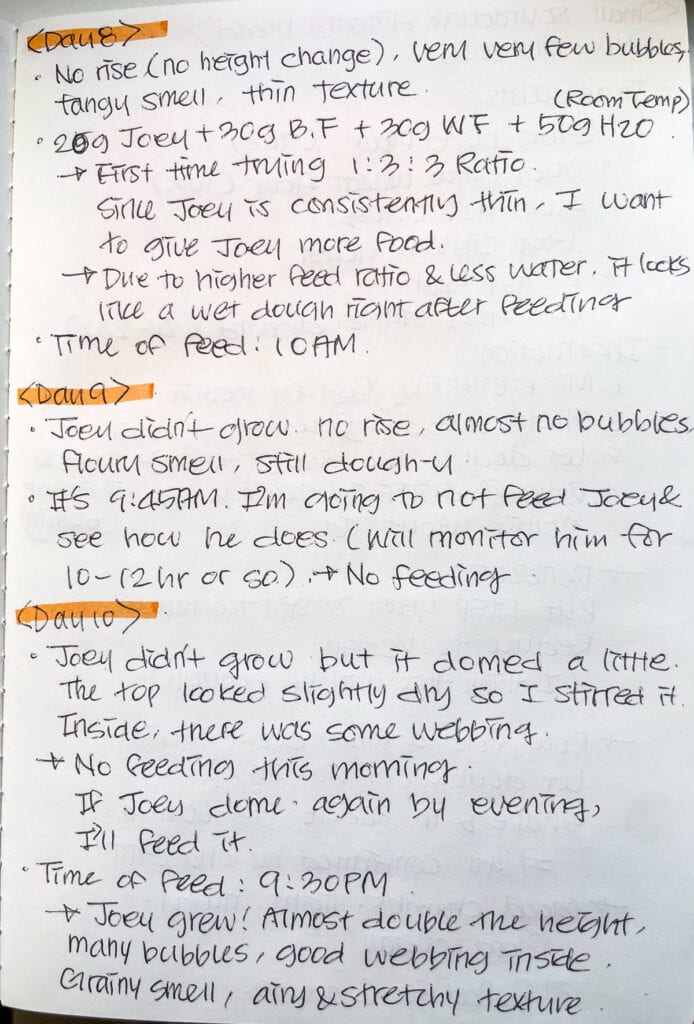
| 8 | 10 am | 20g Joey + 30g BF + 30g WWF + 50g water | None | Tangy | Thin, very few bubbles | Joey is consistenly thin so increased the feed ratio (more flour) |
| 9 | 10 am | (none) | None | Floury | Doughy, no bubbles | No noticeable change |
| 10 | 10 am | (none) | Slight dome | Grainy | Some webbing | The top looked a little dry so stirred it |
| 10 pm | 40g Joey + 20g BF + 20g WWF + 40g water | Doubled | Sweet, grainy | Airy and stretchy | When back to 1:1:1 ratio |
Consistent Growth Phase (Day 11 to Day 15)
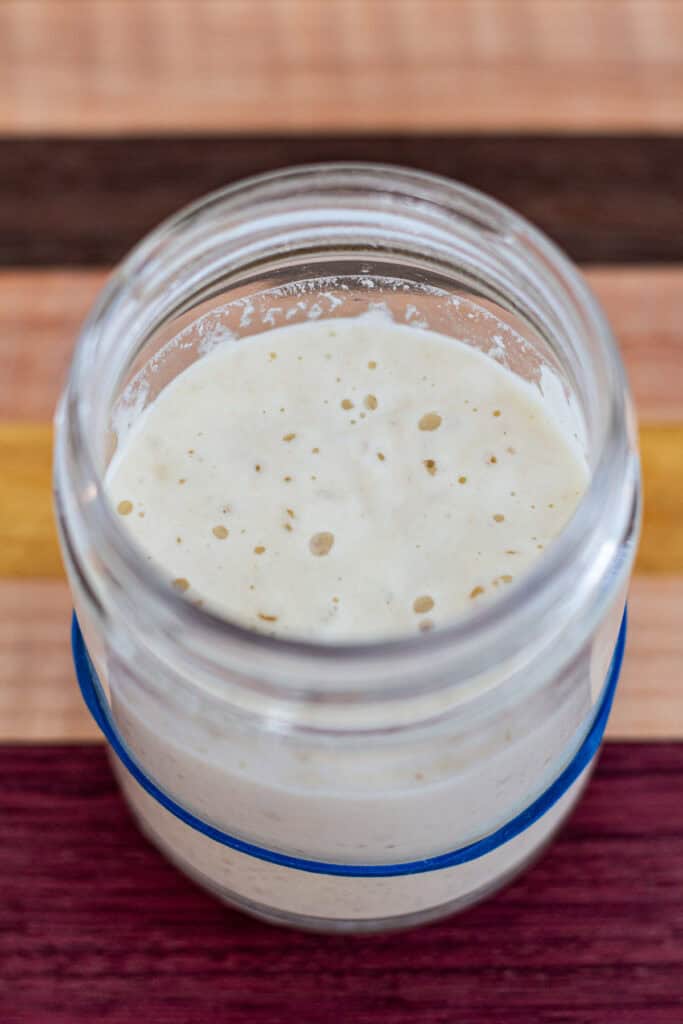
- This is when Joey finally started to feel more predictable. He rose more steadily, the texture looked stronger, and his behavior made a lot more sense.
- Even when he doubled, I still wasn’t always sure if he was ready, so I kept watching the bubbles, the smell, and how stretchy he felt.
- I used this phase to test different feeding ratios and observe how quickly he grew.
- Day 14 note: I fed Joey a 1:1:1 ratio in a separate jar to compare it with my usual higher feed ratio. That’s why there are two Day 14 entries. I baked my first sourdough with the 1:1:1 portion and kept maintaining Joey with the higher-ratio feed.
| Day | Time | Feed | Height | Smell | Texture | Notes |
|---|---|---|---|---|---|---|
| 11 | 8 am | 20g Joey + 20g BF + 20g WWF + 40g water | Doubled | Sweet | Many bubbles, airy and stretchy | Returned to a 1:2:2 ratio |
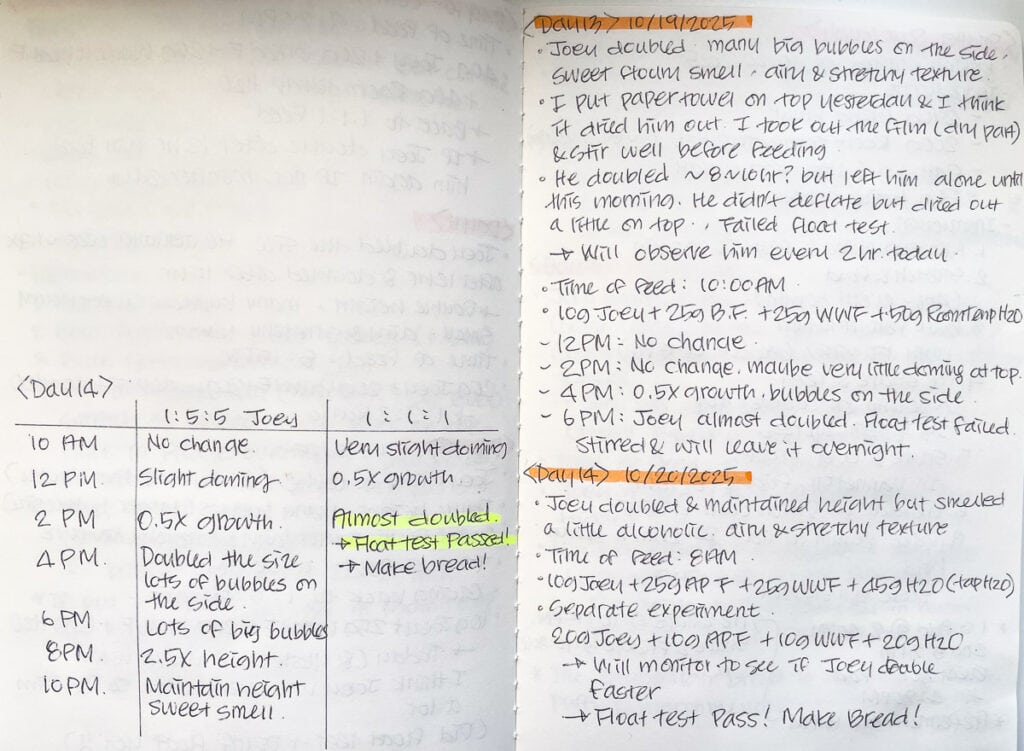
| 12 | 11 am | 10g Joey + 25g BF + 25g WWF + 50g water | Doubled | Sweet grainy | Airy and stretchy | Increased to a 1:5:5 ratio but float test failed |
| 13 | 10 am | 10g Joey + 25g BF + 25g WWF + 50g water | Doubled | sweet grainy | Airy and stretchy, many bubbles | Healthy growth |
| 6 pm | (none) | Doubled | Sweet grainy | Airy and stretchy | Float test failed | |
| 14 | 8 am | 10g Joey + 25g BF + 25g WWF + 45g water | Doubled | Sweet grainy | Airy and stretchy | 1:5:5 ratio, healthy growth |
| 14* | 8 am * | 20g Joey + 10g BF + 10g WWF + 20g water | Doubled | Sweet grainy | Airy and stretchy | Passed float test after 4 hr, ready to bake |
| 8 pm | (none) | 150% | Sweet grainy | Airy and stretchy | Healthy growth | |
| 11 pm | 10g Joey + 15g BF + 15g WWF + 30g water | Held height | Sweet grainy | Airy and stretchy | Kept 10g, returned to 1:3:3 ratio | |
| 15 | 10 am | 10g Joey + 15g BF + 15g WWF + 30g water | Doubled | Sweet grainy | Airy and stretchy | Left at room temp for 1hr, then moved to fridge |
How to Know When Your Starter Is Ready
- Doubles in Volume: The starter visibly doubles (or more) within 4 to 8 hours after feeding. In warm weather it may double faster, and in colder weather it may take longer.
- Check the Peak: It’s at its highest point of rise or just beginning to deflate, which means it has reached peak activity.
- Float Test: A small, unstirred spoonful gently dropped into water floats.
(This works best when your starter is freshly fed and at its peak.) - Plenty of Bubbles: The starter looks aerated with many bubbles throughout.
- Pleasant Aroma: It smells mild, sweet-tangy, and yeasty but not harsh.

What I Learned
- My starter didn’t develop in a straight line. It had quiet days, confusing days, and sudden bursts of activity.
- Paying attention to texture, smell, and small changes helped me trust the process more.
- Adjusting feed ratios, resetting amounts, and responding to what I saw made me feel more connected to the starter.
- Patience mattered more than anything else.
Sourdough Starter Maintenance Phase
Once both starters were strong and consistent, I moved to a simple, flexible maintenance routine. I keep them in the fridge, and I only feed them when they need it or when I’m planning to bake.
| Starter | Maintenance Frequency | Typical Amount Kept | Feed Ratio | Storage |
|---|---|---|---|---|
| Joey | 7 to 14 days | 10g | 1:3:3 | Fridge |
| Friend's starter | Once a week | 15g | 1:2:2 | Fridge |
How I feed them
- Joey:
I mix 10g Joey + 30g flour (a mix of bread flour and whole wheat flour) + 30g water. I let him sit at room temperature until he rises by at least 30% (usually somewhere between 30–50%) then place him back in the fridge. - Friend’s starter:
I mix 15g starter + 30g all-purpose flour + 30g water because that’s how she feeds hers. I let it grow 30–50% before putting it back in the fridge.
Why I only let them rise 30–50% before refrigeration
Letting the starter rise at least 30% tells me that it has started digesting the fresh feed. This “wake-up” phase is enough to get the yeast and bacteria active again without letting them burn through all their food.
I avoid letting my starter fully double unless I’m planning to bake.
Refrigerating it at 30–50% growth leaves plenty of food available for the slower pace of fermentation in the cold, which keeps the starter from starving.
How long does it take to reach 30%?
This changes every single time depending on the temperature of my apartment.
- On warmer days, it might take an hour or two.
- On cooler days (especially when my home is around 67–68°F), it can take much longer.
This variation is completely normal.
Starters are living cultures, and their timing shifts with the room temperature. So I always go by how much they’ve risen, not the clock.
How to Build the Amount You Need
You can always adjust your starter based on how much you need for a recipe. For example, if I have about 50g of starter but the recipe calls for 100g, I will feed my starter 50g flour and 50g water. That brings the total to 150g. I use the 100g I need for baking, then feed whatever is left to maintain it for next time. This keeps the process flexible and makes it easy to build the right amount without wasting anything.
I hope my daily notes and the ups and downs along the way bring you a little comfort. Building a starter isn’t always clear or predictable, and there were many days I felt unsure too. If you’re in that stage, you’re not alone.
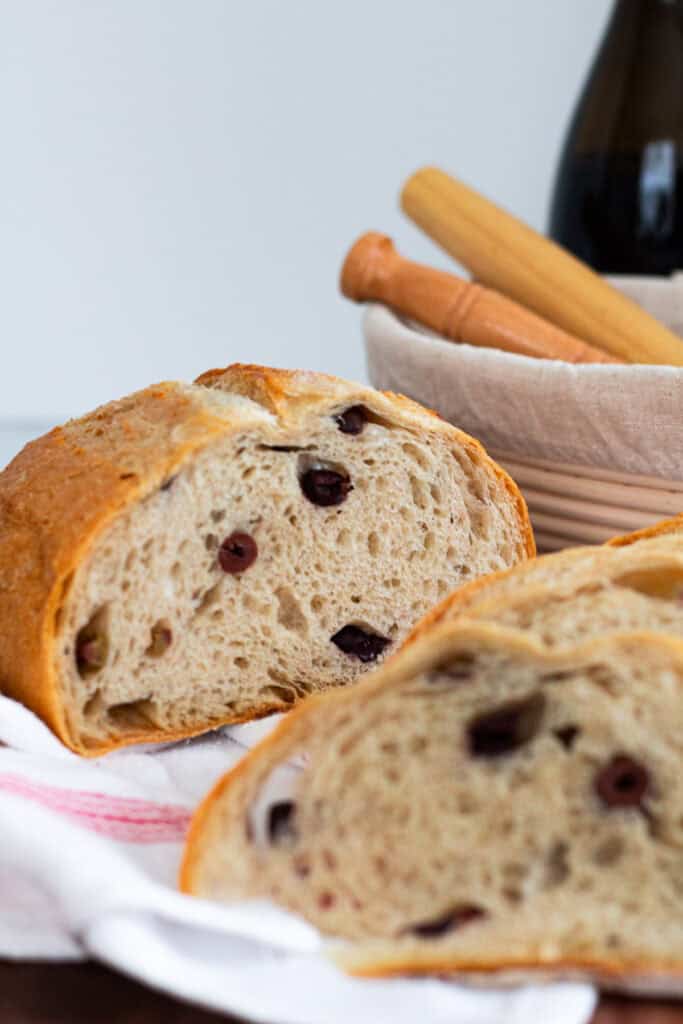
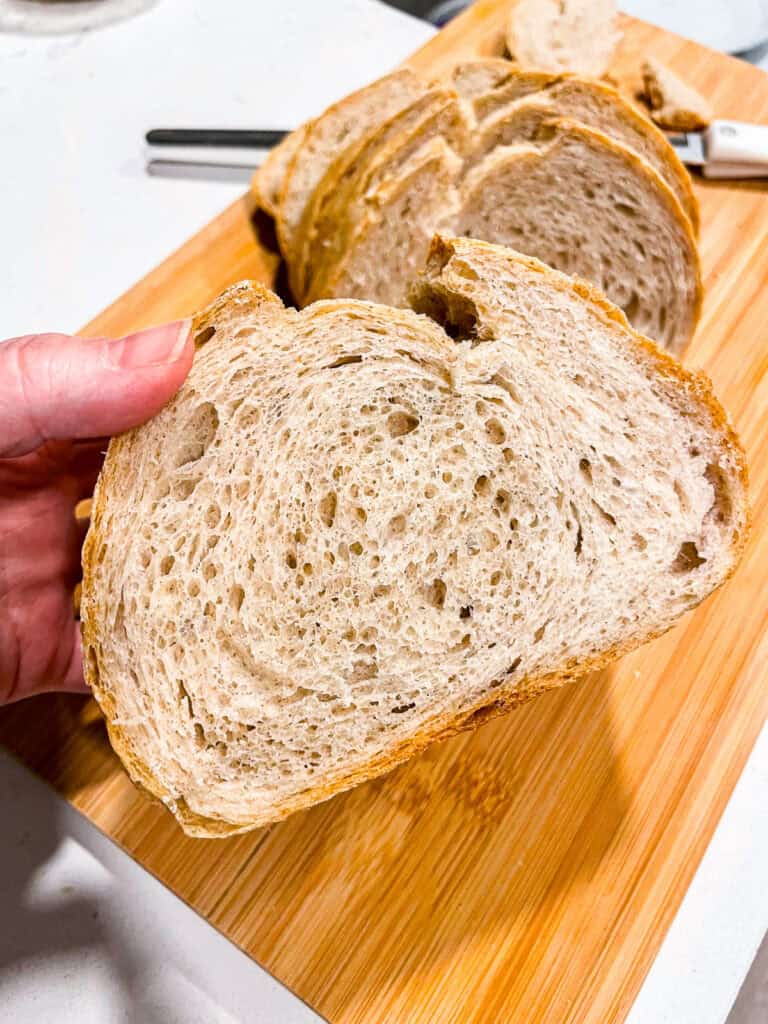
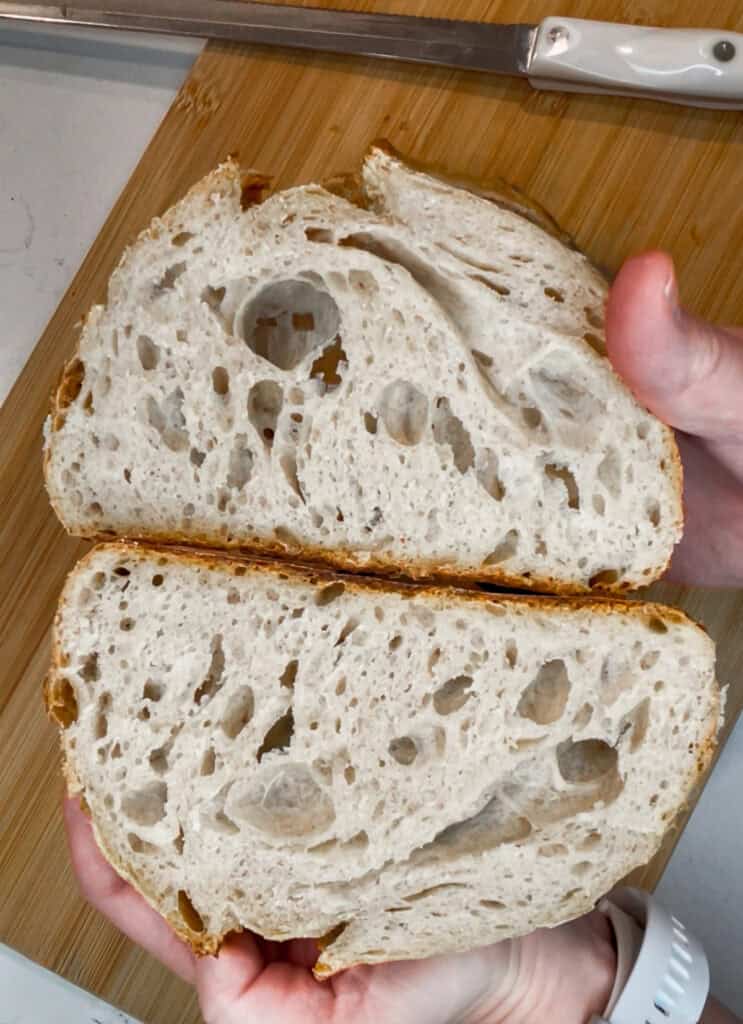
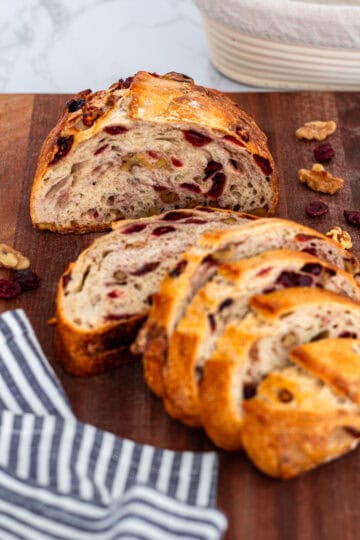
Trust what you see, stay curious, and let your starter grow at its own pace. You don’t have to do everything perfectly to end up with something healthy and active. Now that Joey is part of my kitchen, I’ll be sharing the breads and recipes I’ve been baking with him, starting with my Foundational Sourdough Discard Bread.
In that post, you’ll find everything from the simple discard version to how to turn it into a true sourdough loaf, plus the core techniques that help you get comfortable with sourdough baking. I can’t wait for you to bake along with me.
How to Make and Maintain a Sourdough Starter
Learn how to build a sourdough starter from scratch and maintain it with easy, consistent feedings.
- Prep Time: 5 minutes
- Cook Time: 0 minute
- Total Time: 5 minutes
- Category: Bread
- Method: Fermentation
- Cuisine: American
Ingredients
-
Flour
-
Water
-
Clean jar
-
Kitchen scale
Instructions
Create the Starter (Day 1 to Day 8)
-
Day 1: Mix 50 g flour and 50 g water. Cover loosely and leave at room temperature for 24 hours.
-
Day 2: Add 30 g flour and 30 g water. Leave at room temperature for 24 hours.
-
Day 3: Add 30 g flour and 30 g water. Leave at room temperature for 24 hours.
-
Day 4: Remove half. Add 30 g flour and 30 g water. Leave at room temperature for 24 hours.
-
Day 5: Add 30 g flour and 30 g water. Leave at room temperature for 24 hours.
-
Day 6: Remove half. Add 30 g flour and 30 g water. Leave at room temperature for 24 hours.
-
Day 7: Add 30 g flour and 30 g water. Leave at room temperature for 24 hours.
-
Day 8: Check if the starter is ready. Look for bubbles, steady growth, and a mild tangy smell. If not ready, repeat the cycle starting from Day 4 until activity becomes consistent.
How to Maintain Your Starter
-
Keep a small amount of starter and feed it with fresh flour and water at a consistent ratio.
-
Many bakers use a 1:1:1 ratio, which means equal parts starter, flour, and water. Others prefer higher ratios like 1:2:2, which means one part starter to two parts flour and two parts water. Higher ratios slow fermentation and give the starter more food.
-
After feeding, let the starter sit at room temperature until it becomes visibly active and grows at least 30 percent.
-
Once it shows this activity, store the starter in the refrigerator.
-
Feed it regularly to keep it healthy. I like to feed mine every 7 to 10 days as a comfortable rhythm.
Notes
-
The Day 1 to Day 8 method is from The Sourdough Whisperer. You can refer to my daily log above to see how I adjusted the process and still built a strong starter.
-
Although the book recommends maintaining a starter at 1:1:1, I prefer using at least 1:2:2 because my starter consumes smaller feedings too quickly. Higher ratios help extend the time between feedings and keep the starter stable.
-
A mature starter should rise steadily after feeding, smell pleasant, and show consistent bubbles.
-
If your kitchen is cool, fermentation may take longer. Continue repeating the Day 4 cycle until activity strengthens.
-
Whole wheat or rye flour can help boost fermentation if your starter seems slow.

Share your thoughts below!