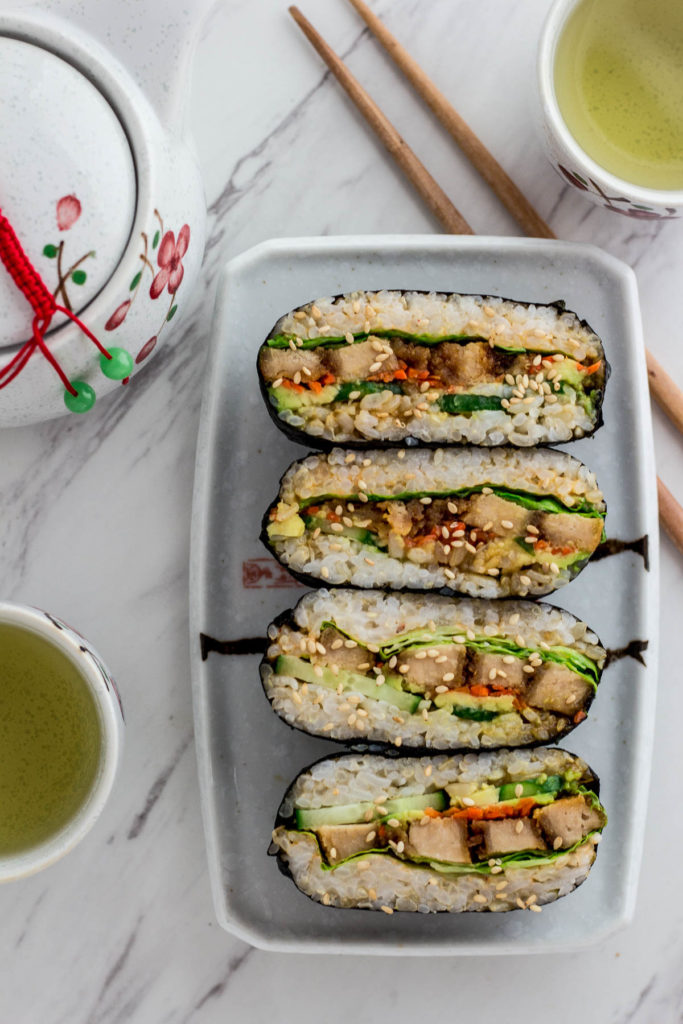
Onigirazu, or Japanese rice sandwich, is made with plain short-grain rice, nori, and your favorite fillings. Learn the step-by-step folding technique for perfect onigirazu every time — this version is 100% vegan.
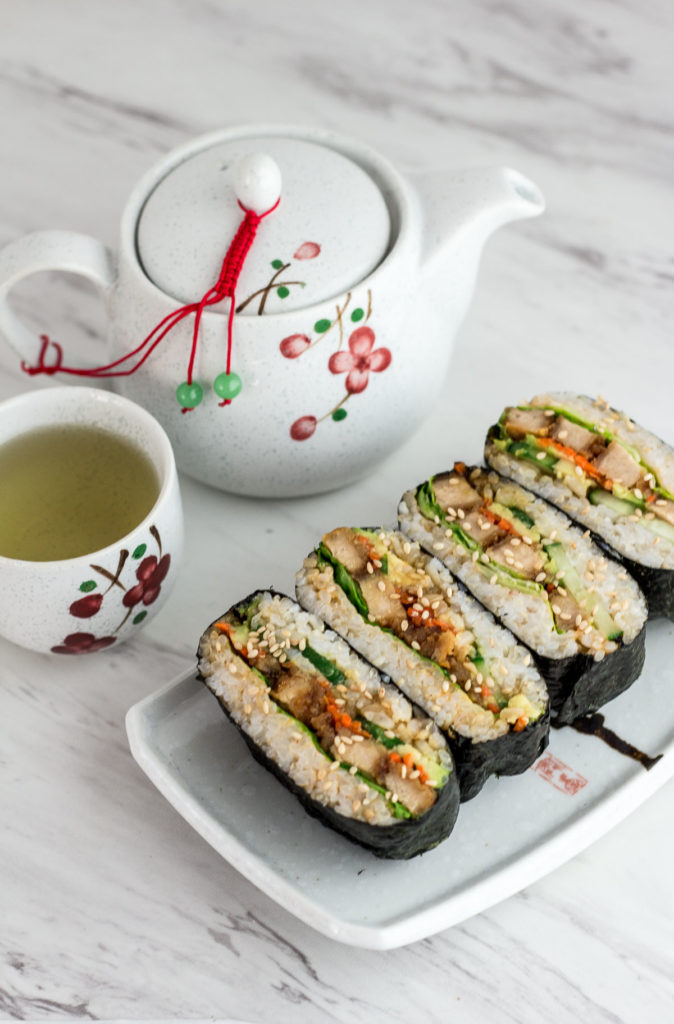
Onigirazu is a Japanese rice sandwich made with nori, cooked plain short-grain rice, and your choice of fillings. Unlike sushi rolls or onigiri, it’s folded by hand with no special tools needed. This vegan version focuses on the step-by-step folding technique so you can make perfect onigirazu every time. It’s ideal for packing lunch, meal prepping, or enjoying fresh at home. This updated version includes small recipe changes for better flavor and flexibility.
Jump to:
What is Onigirazu?
Onigirazu is a modern twist on traditional Japanese onigiri (triangle-shaped rice balls). The name onigirazu literally means “without molding.” Instead of being tightly shaped into a triangle, it’s assembled flat and folded up using a sheet of nori. Unlike sushi rolls, onigirazu is made with plain cooked short-grain rice, which keeps the flavor focus on the fillings.
Why You’ll Love This Recipe
- Step-by-step folding guide – Learn the exact technique for perfect onigirazu every time.
- Endlessly customizable – Onigirazu works with endless combinations, and you can swap in any fillings you like.
- No special tools needed – Just your hands and a sheet of nori.
- Perfect for lunchboxes – Easy to pack, portable, and holds its shape well when wrapped.
Ingredients for Vegan Onigirazu
- Cooked sushi rice
- Nori (seaweed sheets)
- Spicy mayo: Vegan mayo and sriracha
- English cucumber, sliced
- Avocado, sliced
- Carrot, shredded
- Eel sauce (vegan-friendly)
- Lettuce leaves
- Vegan chick’n nuggets, baked
How to Make Perfect Onigirazu
- Prepare the fillings : Slice the cucumber, avocado, and carrot. Bake the vegan chick’n nuggets according to the package instructions. Mix vegan mayo and sriracha to make spicy mayo.
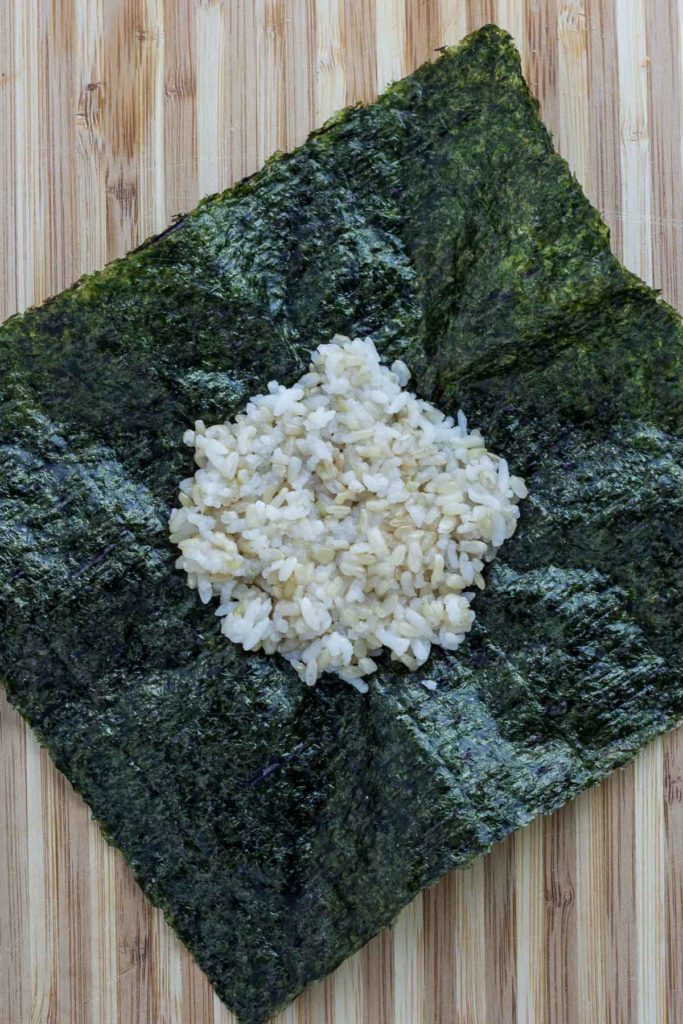
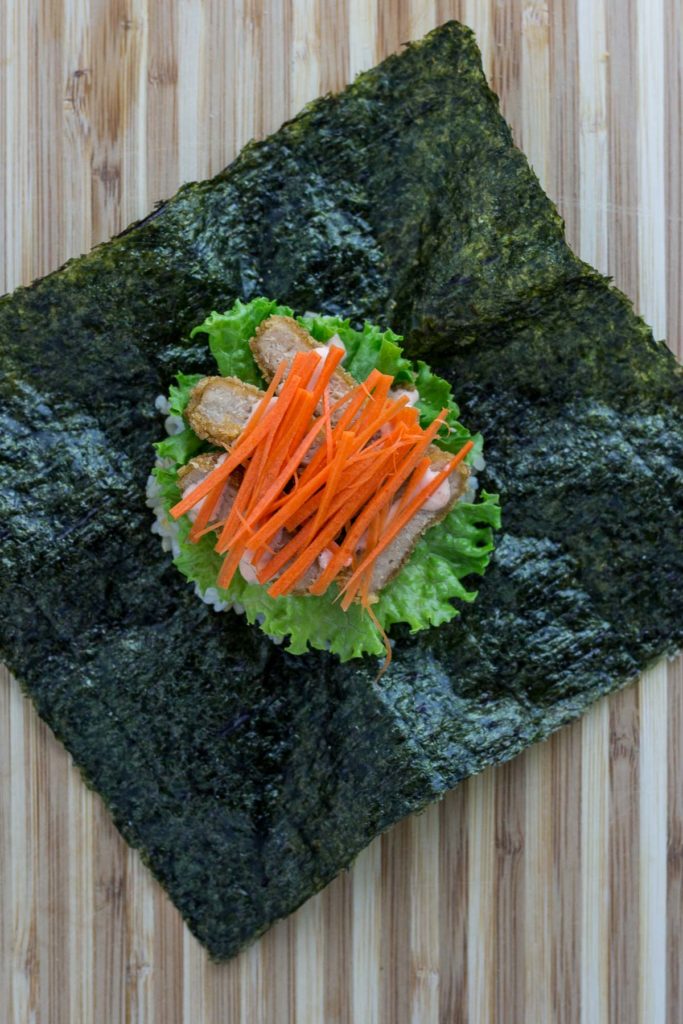
- Prepare the nori: Place a sheet of nori shiny side down on a cutting board, with a corner pointing toward you (so it looks like a diamond shape).
- Add the rice: Scoop a thin layer of cooked rice (about ¼ cup) into the center of the nori, gently pressing it into a square (or circle) shape about the size of your palm.
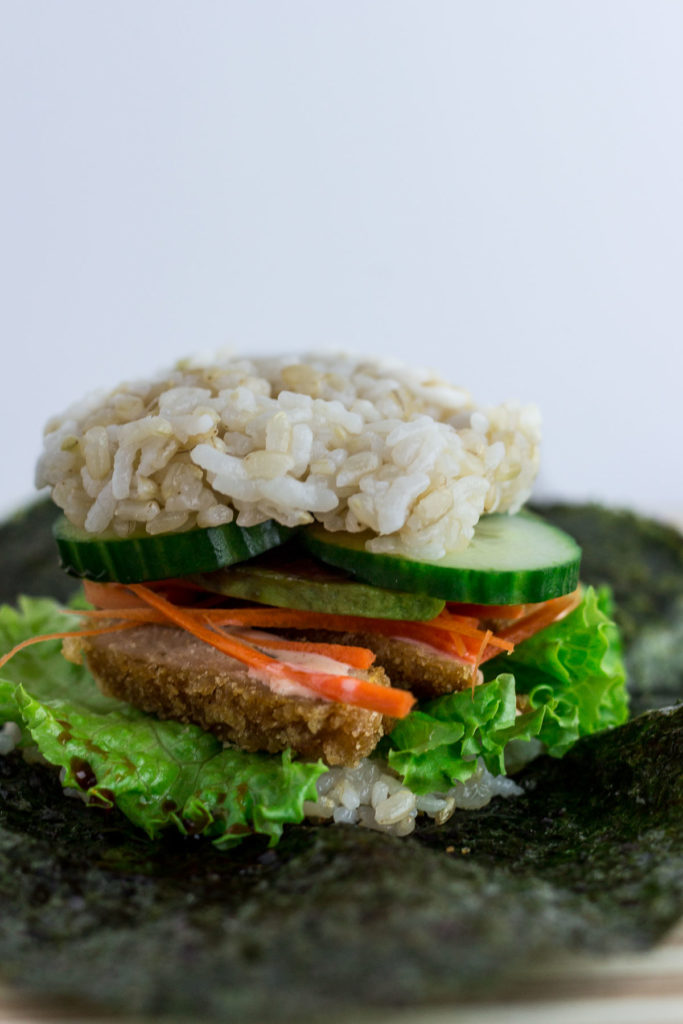
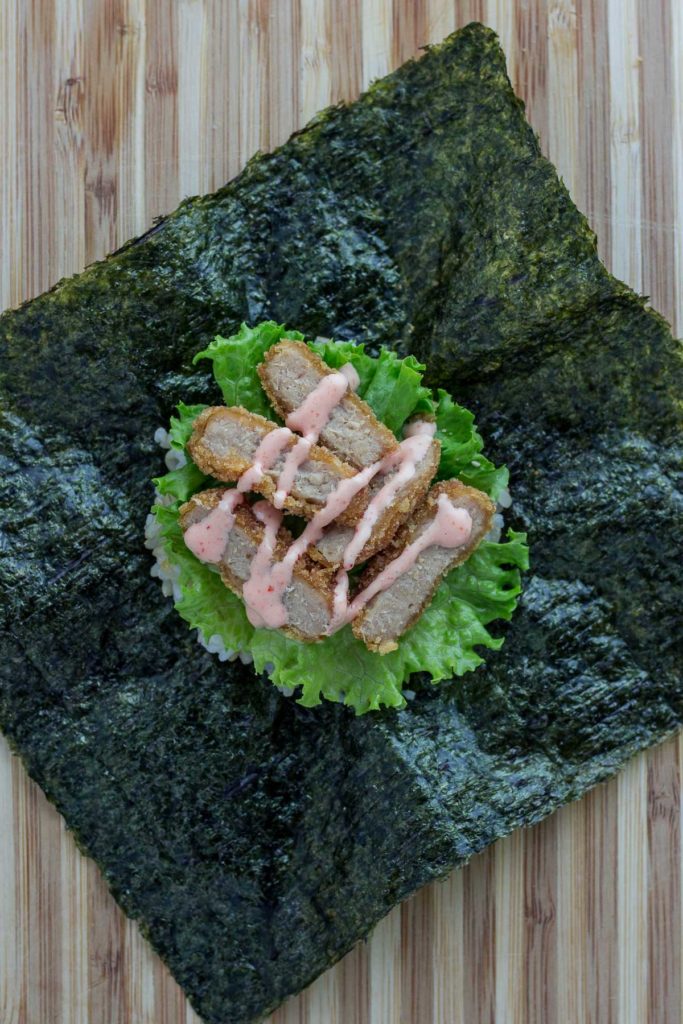
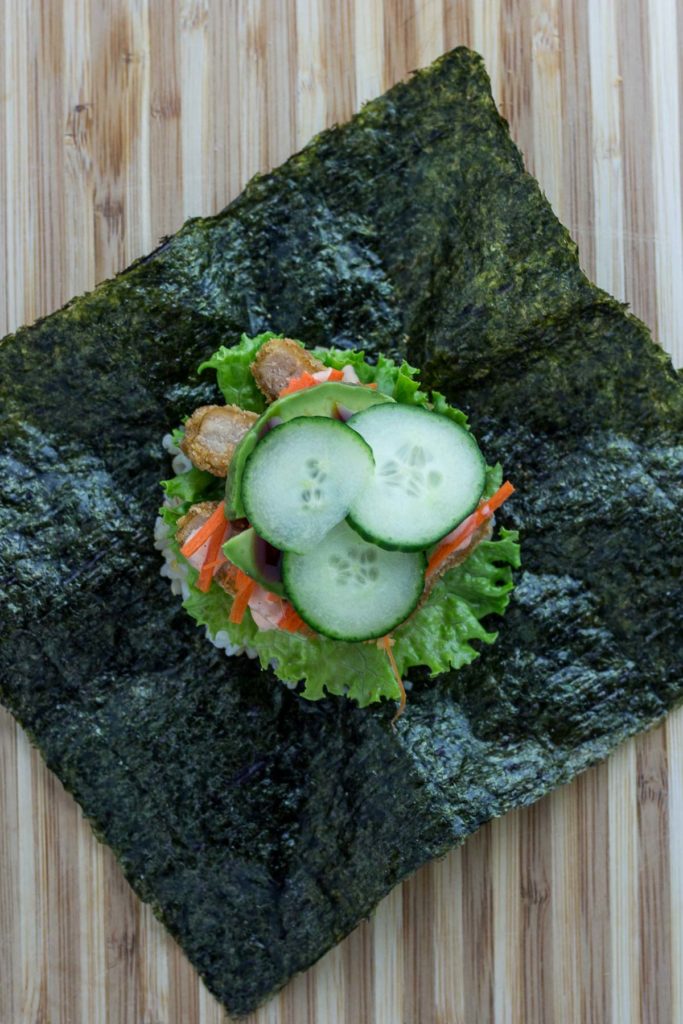
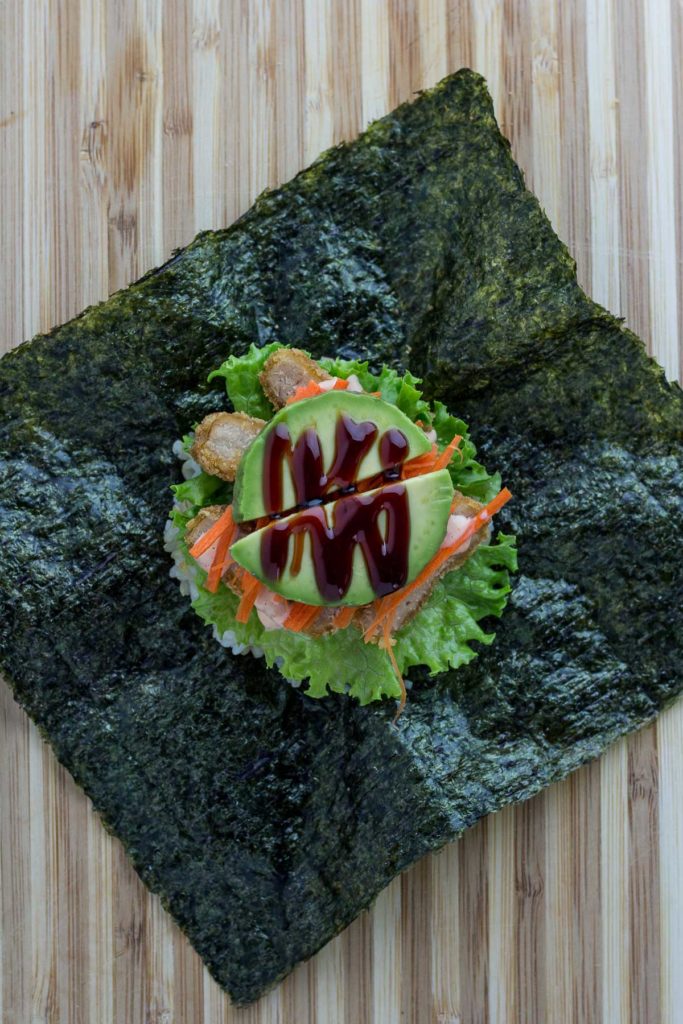
- Layer the fillings: Layer all the fillings - lettuce, chick’n nuggets, spicy mayo, carrot, cucumber, avocado, and drizzle with eel sauce.
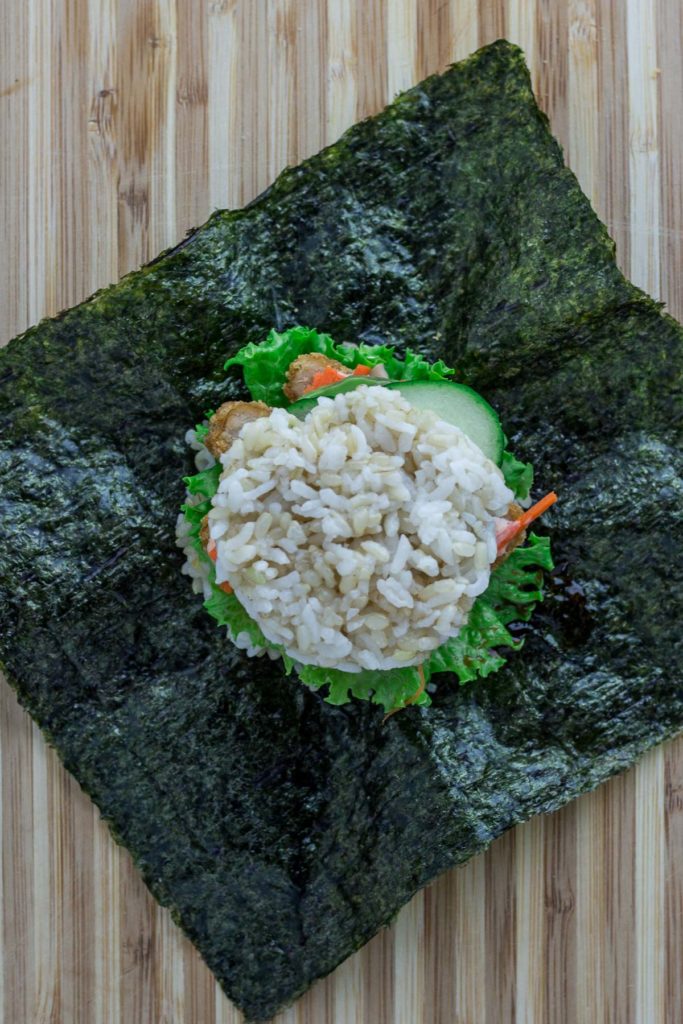
- Top with more rice: Add another thin layer of sushi rice (about ¼ cup) over the fillings.
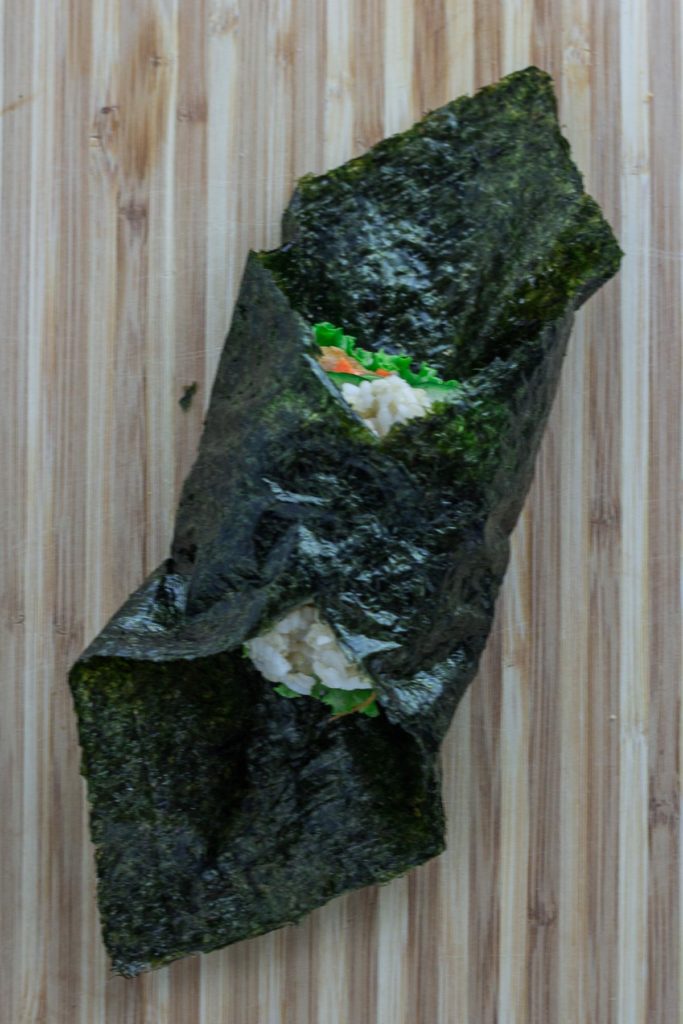
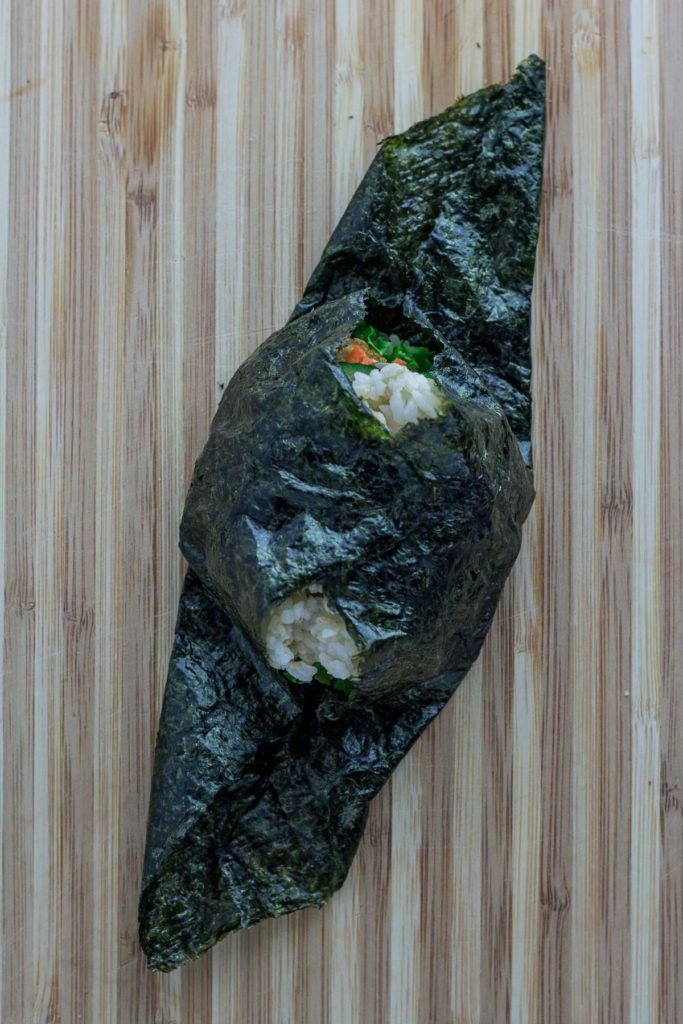
- Fold the nori: Fold the left and right corners of the nori in toward the center over the fillings. Give a gentle squeeze so the nori hugs the rice and fillings. Bring the bottom corner up, then fold the top corner down to seal the parcel.
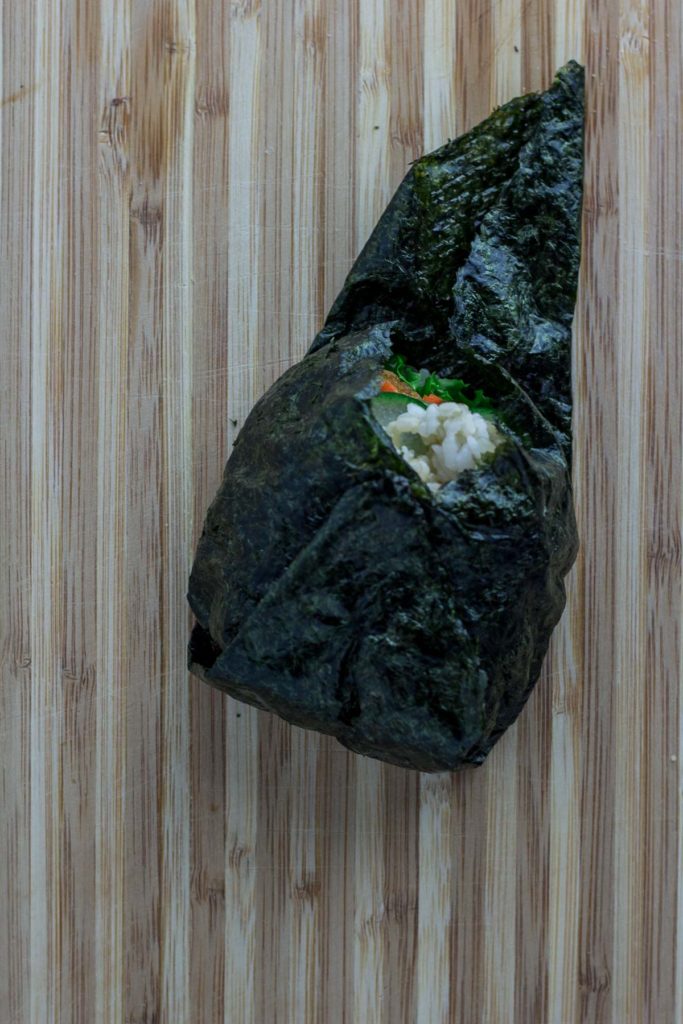
- Wrap and rest: Wrap the onigirazu tightly in cling wrap. Let it sit for 5–10 minutes to allow the nori to seal.
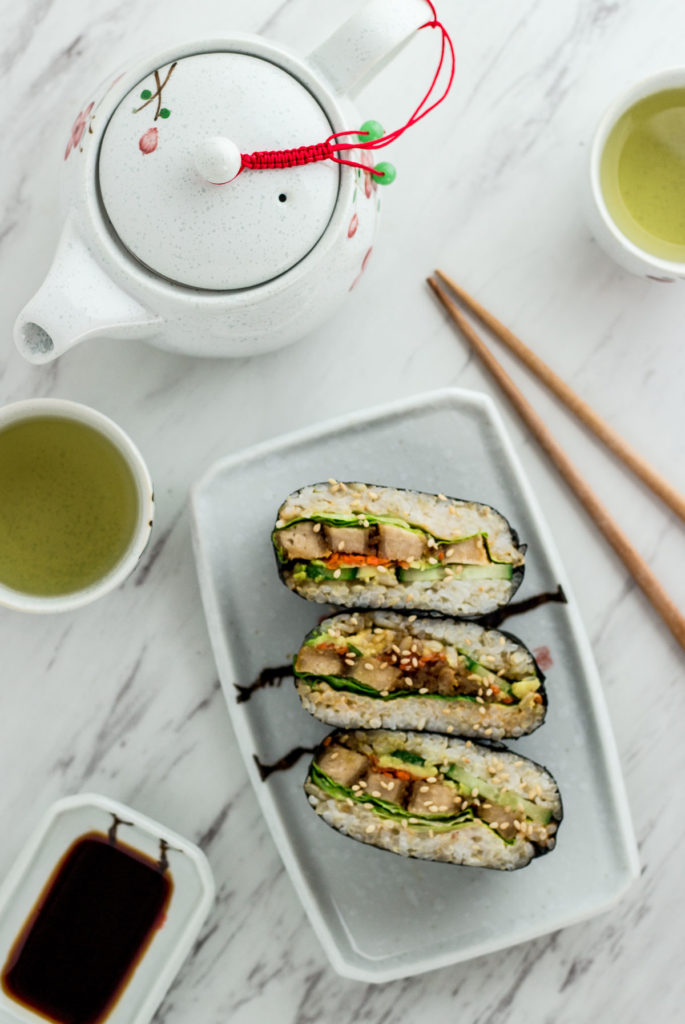
- Slice and serve: Using a sharp knife, slice the onigirazu in half. Wipe the knife between cuts for cleaner edges.

Pro Tips for Vegan Onigirazu
- Use slightly warm rice – Warm rice is easier to spread and helps the nori seal better.
- Don’t overfill – Too much filling makes it hard to fold neatly and may tear the nori.
- Layer the fillings strategically – Spicy mayo and eel sauce can make nori soggy, so place them between other fillings to protect the rice layer.
- Wrap tightly – Cling wrap keeps the shape intact and allows the nori to soften just enough to slice cleanly.
- Slice with a sharp knife – Use a sharp, slightly damp knife and a gentle sawing motion. Avoid pressing straight down to cut.
Customization & Variations
- Protein options – Teriyaki tofu, tempeh, vegan deli slices, or veggie patties.
- Fresh veggies – Bell peppers, lettuce, spinach, cucumber, avocado, or shredded cabbage.
- Sauce swaps – Try vegan teriyaki, gochujang mayo, sesame dressing, or your choice of sauce.
- Fusion ideas – Vegan bulgogi with stir-fried kimchi, or kimbap fillings for a Korean-inspired onigirazu.
Frequently Asked Questions
Use the right rice — sushi rice is sticky and holds its shape well. Don’t overfill, as this makes folding difficult. Wrap the onigirazu tightly in cling wrap after folding and let it rest for 5–10 minutes before slicing.
Onigiri are triangle-shaped rice balls often with a filling in the center. Onigirazu, on the other hand, is assembled flat and folded up like a parcel using a sheet of nori — no molding required.
Short-grain Japanese rice works best because it’s sticky enough to hold its shape. Other types of rice, like long-grain or jasmine rice, won’t stick together and will cause the sandwich to fall apart.
Yes! Wrap each onigirazu tightly in cling wrap and store it in the fridge for up to 24 hours. Let it come to room temperature before eating for the best texture. If packing for lunch, keep it wrapped until ready to eat to maintain its shape.
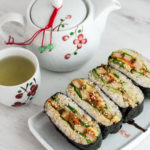
Whether you’re packing lunch, meal prepping, or just craving something fun and portable, this vegan onigirazu is a delicious way to enjoy Japanese flavors at home. Once you master the folding technique, you can customize it endlessly with your favorite fillings. For the perfect pairing, try it with my Vegan Miso Soup. And if you want to explore more Japanese cooking, check out my Japanese Pantry Guide and my Korean kimbap turned into onigirazu!
Vegan Onigirazu (Japanese Rice Sandwich)
Vegan onigirazu (Japanese rice sandwich) – step-by-step guide to making perfect onigirazu every time!
- Prep Time: 30 minutes
- Total Time: 30 minutes
- Yield: 4 onigirazus 1x
- Category: Main course
- Method: Assemble
- Cuisine: Japanese
- Diet: Vegan
Ingredients
-
2 cups Cooked sushi rice
-
4 Nori (seaweed sheets)
-
1 tablespoon of Vegan mayo
-
1 tablespoon of sriracha
- 1 Persian cucumber, sliced
- 1 small Avocado, sliced
- 1 small Carrot, shredded
- 2 tablespoons Eel sauce (vegan-friendly)
- 4 Lettuce leaves
- Vegan chick’n nuggets, baked
Instructions
- Prepare the fillings : Slice the cucumber, avocado, and carrot. Bake the vegan chick’n nuggets according to the package instructions. Mix vegan mayo and sriracha to make spicy mayo.
- Prepare the nori: Place a sheet of nori shiny side down on a cutting board, with a corner pointing toward you (so it looks like a diamond shape).
- Add the rice: Scoop a thin layer of cooked rice (about ¼ cup) into the center of the nori, gently pressing it into a square (or circle) shape about the size of your palm.
- Layer the fillings: Layer all the fillings - lettuce, chick’n nuggets, spicy mayo, carrot, cucumber, avocado, and drizzle with eel sauce.
- Top with more rice: Add another thin layer of sushi rice (about ¼ cup) over the fillings.
- Fold the nori: Fold the left and right corners of the nori in toward the center over the fillings. Give a gentle squeeze so the nori hugs the rice and fillings. Bring the bottom corner up, then fold the top corner down to seal the parcel.
- Wrap and rest: Wrap the onigirazu tightly in cling wrap. Let it sit for 5–10 minutes to allow the nori to seal.
- Slice and serve: Using a sharp knife, slice the onigirazu in half. Wipe the knife between cuts for cleaner edges.
Notes
-
For the best results, use short-grain Japanese rice or sushi rice, avoid overfilling, and wrap tightly before slicing — see Pro Tips above for more details.
-
Check out the Step-by-Step Photos above for a visual guide to folding onigirazu perfectly.


Share your thoughts below!