
Easy pizza dough without a stand mixer (with active dry yeast)- 5 ingredients (water, sugar, active dry yeast, flour & salt) + 1 hour - fancy stand mixer = Perfectly delicious and easy pizza dough!
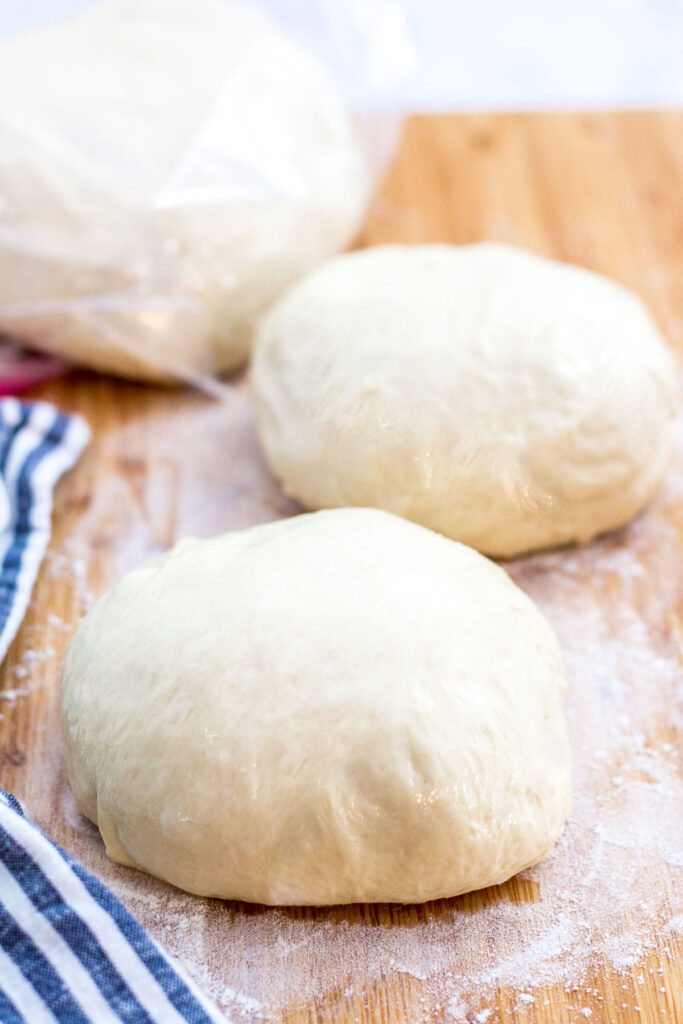
This easy pizza dough without a stand mixer is made with just five pantry staples and comes together in about an hour. If you don't have a stand mixer or simply enjoy kneading dough by hand, this recipe makes a soft, chewy crust that's perfect for homemade pizza.
If you'd rather let a mixer do the work, check out my Stand Mixer Pizza Dough. Making pizza for two? My Small Batch Pizza Dough is a great option.
Jump to:
- Why this recipe works:
- Difference between hand kneading and stand mixer
- How to make pizza dough by Hand
- Kneading in a Bowl vs. on the Counter
- Pro Tips
- Frequently Asked Questions & Troubleshooting
- Pizza cooking temperature
- How to Use This Pizza Dough
- Pizza Basics
- Easy Pizza Dough without a Stand Mixer (by hand)
Why this recipe works:
- No stand mixer required: Just a bowl and your hands.
- Simple pantry ingredients: Flour, yeast, water, sugar, and salt.
- Soft and chewy crust: Perfect for homemade pizzas.
- Easy cleanup: No dough hook or mixer bowl to wash.
Difference between hand kneading and stand mixer
| By Hand | Stand Mixer |
|---|---|
| More hands-on | Mixer does the kneading |
| Less equipment | Slightly faster |
| Easier cleanup | More dishes |
How to make pizza dough by Hand
- Dissolve the sugar in the lukewarm water.
- Sprinkle the active dry yeast over the water and let it bloom.
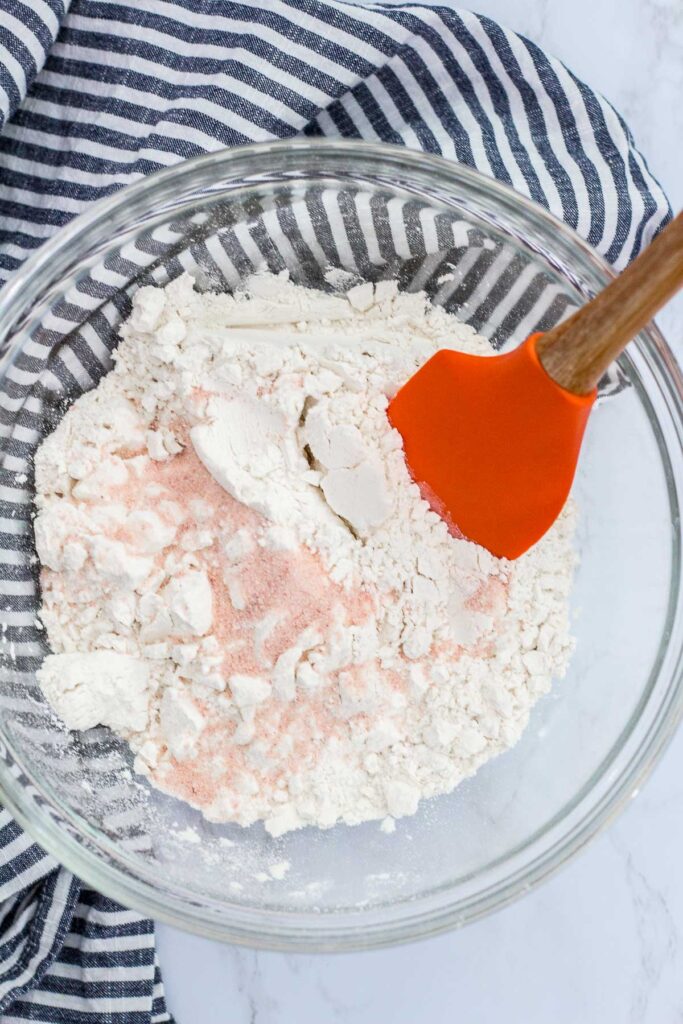
- Meanwhile, stir together the flour and salt in a large bowl. I pack my flour into the measuring cup instead of spooning and leveling it. While that's not the standard measuring method, it's the method I used to develop this recipe. If you prefer, you can also measure the flour by weight or use the spoon-and-level method. (Link to correct flour measuring guide.)
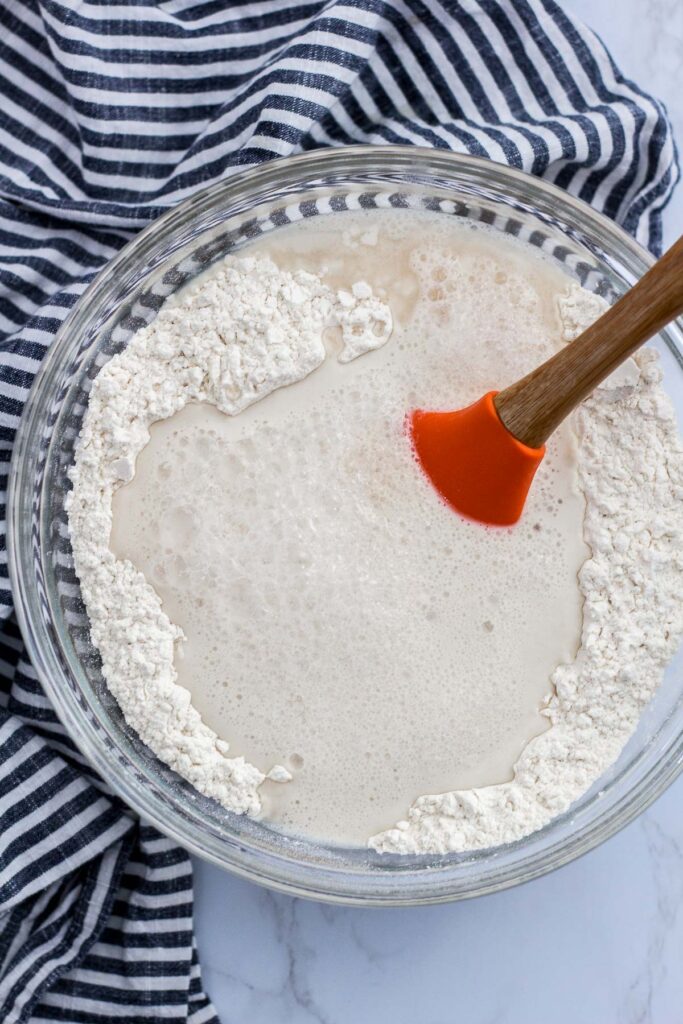
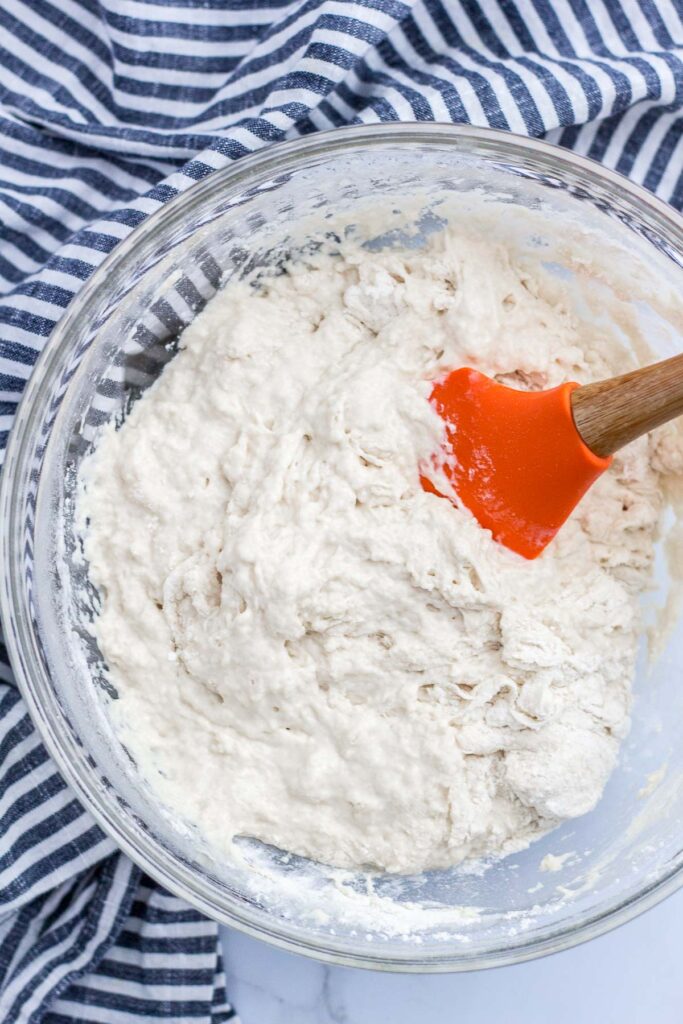
- Pour the yeast mixture into the flour mixture and mix until a shaggy dough forms.
- Knead the dough until it's smooth and elastic, then let it rise until doubled in size.
- Shape the dough, add your favorite toppings, and bake.
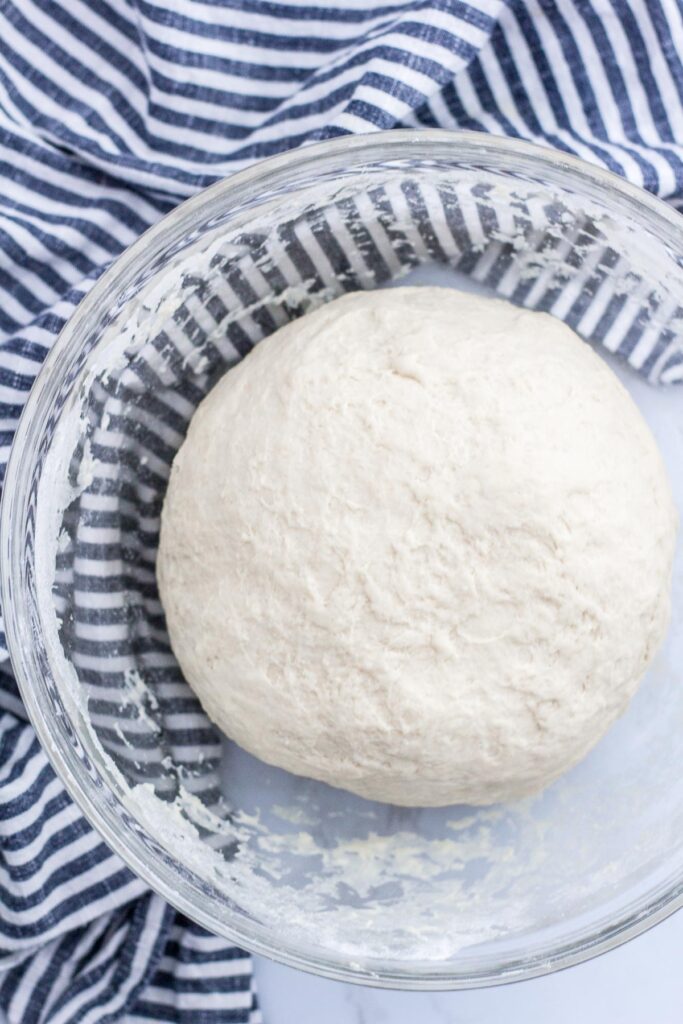
Kneading in a Bowl vs. on the Counter
There is no difference in the final pizza, so it really comes down to personal preference. I prefer kneading the dough in a bowl for a couple of reasons:
- Less cleanup. I don't have to clean the countertop before or after kneading. Since I'm already using a mixing bowl, I prefer to keep the cleanup to a minimum.
- It's easier to knead. I use my fist to press the dough against the side of the bowl, then fold the dough back toward the center and repeat. I find this method easier and more comfortable than kneading on the countertop.
Pro Tips
- Make lukewarm water easily. I mix boiling water and cold filtered water in a 1:2 ratio. For example, to make 2 cups of lukewarm water, mix ⅔ cup boiling water with enough cold water to reach the 2-cup mark.
- Mix the salt into the flour first. Give the flour and salt a quick stir before adding the yeast mixture. This helps distribute the salt evenly throughout the dough.
- Knead until the dough is smooth and elastic. The dough should stretch without tearing easily and hold its shape. If it tears right away, keep kneading for another minute or two.
- Take a short break if the dough fights back. If the dough becomes tight and difficult to stretch while kneading, let it rest for 5 to 10 minutes. This allows the gluten to relax, making the dough easier to knead.
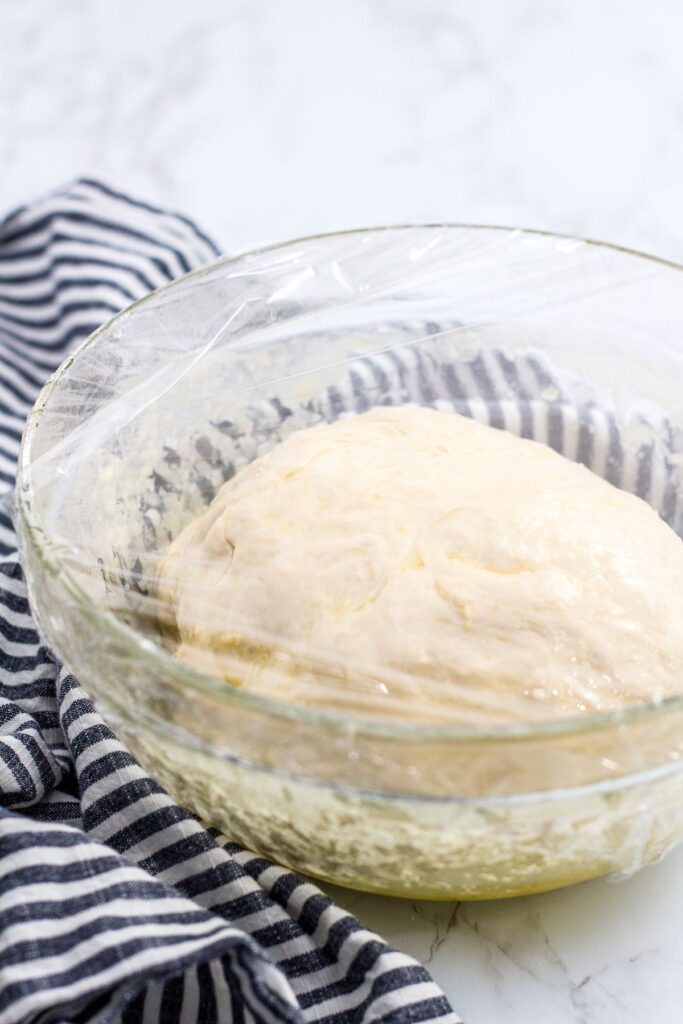
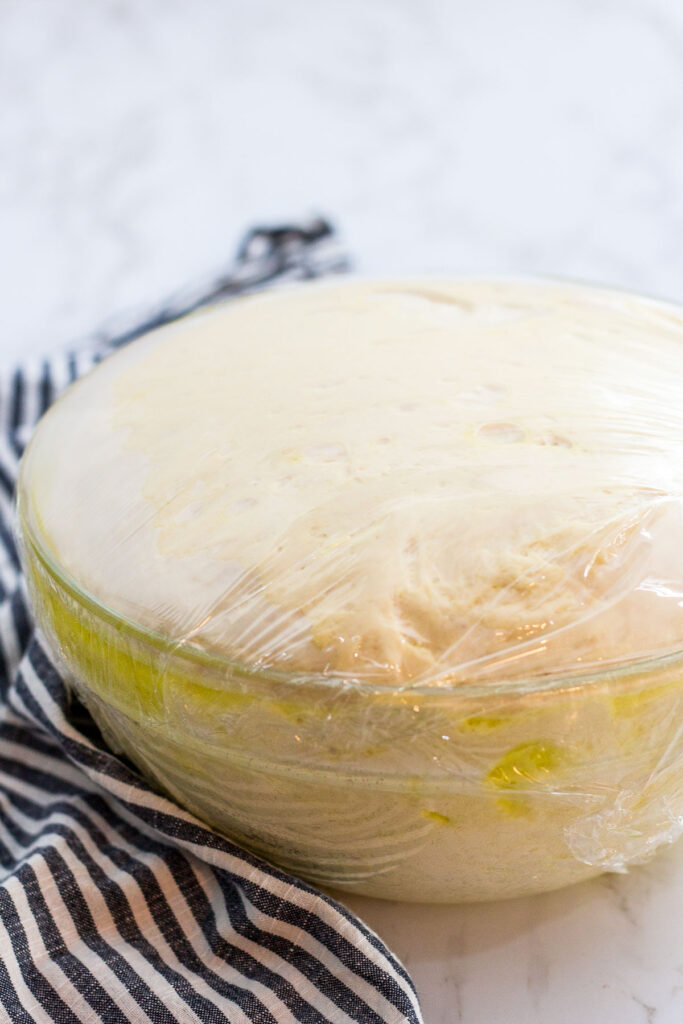
- Keep the dough covered while it rises. Lightly coat the dough with olive oil and cover the bowl with plastic wrap or a clean kitchen towel to prevent the surface from drying out.
- Let the dough tell you when it's ready. Rising time depends on the temperature of your kitchen. In a warm room, the dough will rise faster. In a cooler room, it will take longer. Instead of watching the clock, look for the dough to roughly double in size.
Frequently Asked Questions & Troubleshooting
Active dry yeast needs to be dissolved (or "bloomed") in warm water before using. Instant yeast can be mixed directly into the dry ingredients, so there's no need to bloom it first. Both work well for pizza dough, but this recipe is written for active dry yeast.
Instead of watching the clock, look for these signs that the dough is ready:
- The dough feels smooth and elastic.
- It stretches without tearing easily.
- It holds its shape.
- It feels soft and slightly tacky, but not sticky.
If the dough feels too sticky or too dry, see the troubleshooting tips below.
If the dough feels dry or crumbly, add water ½ tablespoon at a time and continue kneading until it comes together. Be careful not to add too much water at once, as it's easier to add more than to correct an overly wet dough.
If the dough feels sticky, let it rest for 5 to 10 minutes before adding more flour. As the flour hydrates, the dough often becomes easier to handle. If it still feels too sticky after resting, add flour 1 tablespoon at a time until the dough is soft, slightly tacky, and easy to work with.
The dough is ready when it has roughly doubled in size. In a warm kitchen, this usually takes 45 to 60 minutes, but it may take longer in cooler temperatures.
To check, gently press your finger about ½ inch into the dough. If the indentation slowly springs back and remains slightly visible, the dough is ready to use. If it springs back immediately, it needs more time to rise.
If the indentation doesn't spring back at all, the dough may be slightly overproofed. Don't worry. It's usually still perfectly fine to use. Overproofed dough tends to be softer and stickier, so you may need to dust it with a little extra flour while shaping it. The finished pizza will still taste delicious.
Yes! Pizza dough can be refrigerated for up to 3 days or frozen for up to 3 months.
If you're making the dough ahead of time, you can let it rise overnight in the refrigerator. This slower rise, also known as cold proofing, develops a deeper flavor.
To freeze the dough, place it in a freezer-safe bag or airtight container. When you're ready to use it, thaw it in the refrigerator overnight or let it sit at room temperature until completely thawed. Keep the dough covered while it thaws so it doesn't dry out.
Both recipes use the same basic ingredients and produce a soft, chewy pizza crust. The main difference is how the dough is kneaded. This recipe is kneaded entirely by hand, while my Stand Mixer Pizza Dough lets the mixer do the work. If you're making pizza for two, my Small Batch Pizza Dough is another great option.
Pizza cooking temperature
For the best homemade pizza, bake it at the highest temperature your oven can safely reach. A hotter oven helps the crust rise quickly, creates better browning, melts the cheese evenly, and gives the pizza more flavor.
I bake my pizzas at 475°F, which produces excellent results with this dough. If your oven can comfortably reach 500°F, feel free to bake it at that temperature instead. Just start checking the pizza 1 to 2 minutes earlier, as it will cook a little faster.
How to Use This Pizza Dough
This homemade pizza dough is incredibly versatile. Use it to make everything from a classic white pizza or BBQ Chicken Pizza to a hearty Sausage and Pepper Pizza, fresh Pesto Tomato Pizza, or even a thick and fluffy Detroit-Style Pizza.
For a traditional round pizza, simply stretch or roll the dough into your desired size and add your favorite toppings.
If you're making Detroit-Style Pizza, press the dough into a well-oiled pan and let it rise until puffy before adding the sauce and toppings. Handle the dough gently so you don't deflate the air bubbles that create its light, fluffy texture.
Pizza Basics
If you're just getting started with homemade pizza, these recipes will help you build a great pizza from the ground up:
- Small Batch Pizza Dough: Perfect for pizza night for two.
- Stand Mixer Pizza Dough: Same great dough with less hands-on work.
- Sourdough Discard Pizza Dough: A great way to use up extra sourdough discard.
- No-Cook Pizza Sauce: A quick homemade sauce that's ready in minutes.
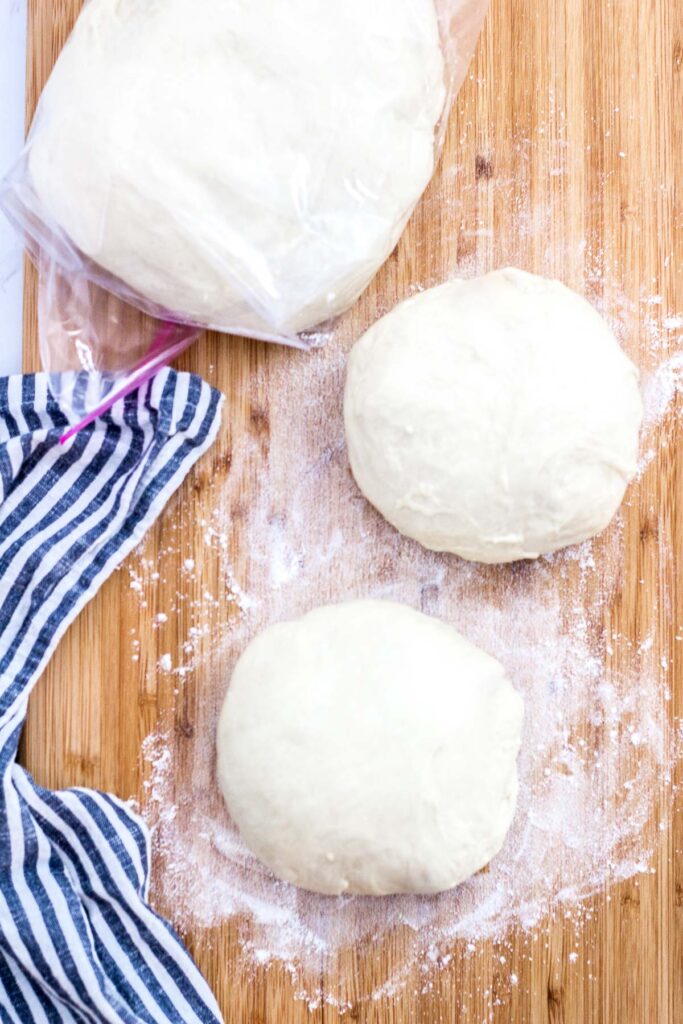
Easy Pizza Dough without a Stand Mixer (by hand)
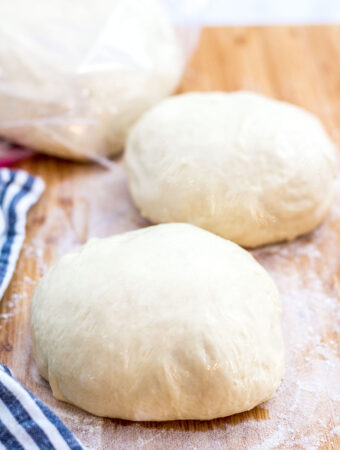
Easy Pizza Dough without a Stand Mixer (by hand) - 5 ingredients (water, sugar, active dry yeast, flour & salt) + 1 hour - fancy stand mixer = Perfectly delicious and easy pizza dough!
- Prep Time: 70 minutes
- Total Time: 1 hour 10 minutes
- Yield: 2 large pizzas 1x
- Category: Appetizer
- Method: Knead
- Cuisine: American
- Diet: Vegan
Ingredients
- 2 cups lukewarm water
- 1 tablespoon sugar
- 1 tablespoon active dry yeast ( or 1 packet of active dried yeast) (See note)
- 4 and ½ cups (packed) all-purpose flour (See note below)
- 2 teaspoons salt
- 2 tablespoons extra virgin olive oil
Instructions
- Dissolve the sugar in lukewarm water. Once the sugar is all dissolved, add the dry active yeast to water and let it bloom for about 10 minutes.
- Meanwhile, mix together the salt and 3 cups of packed flour in a large bowl.
- Add the yeast mixture to the flour mixture and stir to mix with either a rubber spatula or a wooden spoon. Slowly add in the rest of the flour. Use the rubber spatula/wooden spoon to mix as much as you can.
- Once it gets difficult to mix using a rubber spatula, use your hands to knead the dough until it comes together, about 10 to 15 minutes. The surface of the dough should be smooth and when you pull the dough, it should stretch without ripping.
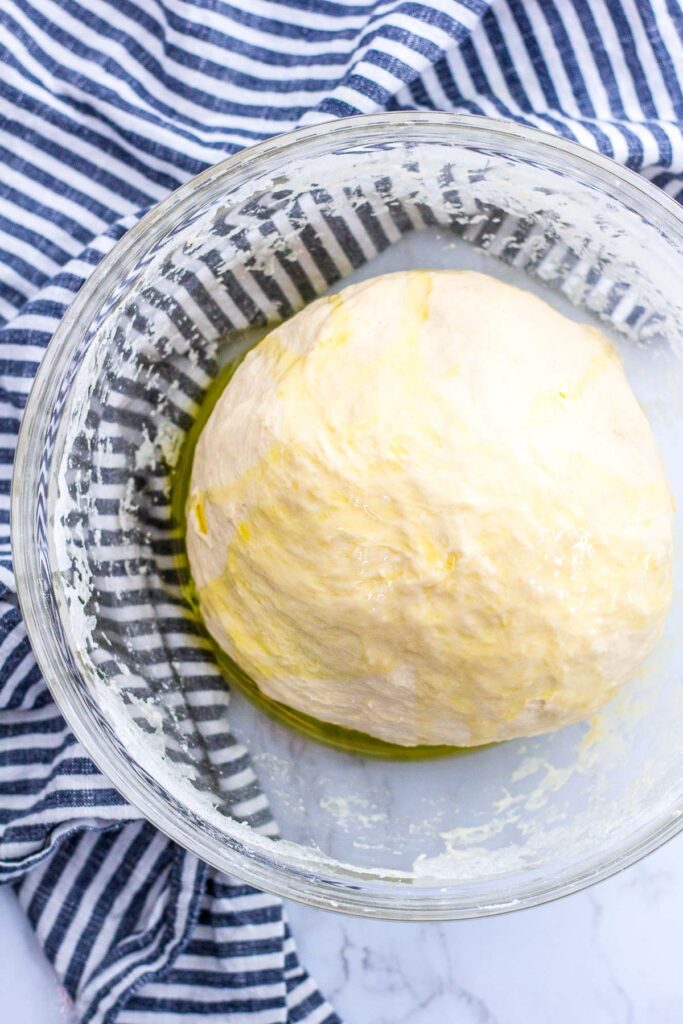
- Take the dough out of the bowl and add the extra virgin olive oil. Place the dough back into the bowl. Roll the dough in a bowl so it is completely coated with the oil. Make sure to coat the side of the bowl as well.
- Loosely cover the bowl and let it rise until it doubles its size (it takes me about an hour).
Notes
- One packet of active dried yeast equals 2 and ½ teaspoons. However, if you have a bag of yeast as I do, you can just measure 1 tablespoon.
- Packing flour is an incorrect way to measure flour. And I do not recommend measuring flour like this in other recipes. However, this method works in THIS pizza dough recipe.
- Please refer to the "How to store pizza dough" section above for storing information.


Viviane says
Well, I had posted a couple of questions and it turns out that I did a little read through your sites and eventually I found the answers to my question so I went ahead and I made the pizza dough and I used a yeas that was possibly out of date, but I had kept it in the fridge and so it seems that I have extended it because I tested it and it did bloom so I went ahead and made the pizza dough following your directions up to the point of baking because for some reason, I seem to have lost that portion of the recipe it stops at the preparation point, but it doesn’t go on to tell me about the baking in the time so I roamed around a bit more and eventually I found something fit what I was trying to do and instead of cutting it in half or portioning it silly me I just went ahead and put the whole thing in my baking sheet and put the toppings on, etc. etc. and then I had preheated the oven to 400 and sure enough as soon as I open the door, the sensor went off, but I thought to myself while I can only go forward. I’m not gonna go back so I put the pizza in the oven and it was at 400 and I set the timer for 25 minutes and sure enough when I open the door again after 25 minutes the sensor went off again. I’m gonna have to do something with it. Not sure what yeah but anyway as I looked at the pizza, I thought to myself, you know it probably needs a little bit more so I turned the broiler on and put it back in for about four or five minutes. Try to take a peek and the sensor went off again ha ha ha it’s almost like I’ve got an audience and they clapping every time I open the oven door so anyway after a few minutes, I took the pizza out and oh my goodness considering I used the yeast that had gone past the expiry date this pizza dough had continued to rise and now I’ve got not a thin crispy base. I have a thick fluffy base almost like a focaccia but anyway it smelt wonderful. It looked great so I decided I was gonna just go ahead and serve it to myself for supper and it was delightful. I want to thank you so very much for making a recipe that was easy to follow simple to do without a stand mixer and I now have 3/4 of pizza left which I’m gonna have to freeze because this is this was huge and I have to remember next time to portion it out better but thank you again. It was very very easy and very simple and I am thrilled to bits and I shall use this recipe every time I want to make pizza dough thank you again.
George says
Thank you so much for the update, Viviane! I’m so glad the dough worked out for you, even with the older yeast 😊 And yes, you can definitely freeze extra dough after the first rise for another pizza later. Your focaccia-style pizza honestly sounds delicious. Thanks again for trying the recipe and sharing your experience!
Viviane says
I have already asked a question in my reply to your reply, but not sure if you will see it or not so I’m going to repeat myself by asking the very same question here in a brand new comment I want to thank you so much for replying to my previous comment, it is a pleasure to see you answering personally to all our questions. I appreciate that very much so now I have used a yeast which I believe was expired by the date on the bag which I could not read, but I vaguely remember the date so I did the blooming test and it bloomed so I went ahead and used it to make the pizza dough and we’ll have to wait and see. I have now left it to sit and rise for an hour and so my question is if I go past the hour, is there any harm in that because I have a feeling that it might take longer than an hour just because of the fact that the yeast is a little mature, and I also believe that I had too much dough for myself, and I would like to be able to freeze the rest of it and I’m wondering if you could respond to that for me I could maybe do it in portions for one pizza if you know the measurements for that I would appreciate it and I’m also going to follow the suggestion you gave me in my previous question about the temperature of the oven and pre-cooking it a little bit on the stove so I appreciate that very much
Viviane says
I have a question about the oven temperature. I have a very sensitive sensor in my kitchen and if my oven goes above 400 it goes off am I able to cook the pizza at 400?
George says
Hi Viviane, that’s a great question! I haven’t tested this recipe at 400°F, so I’m not completely sure how it will turn out. In general, lower oven temperatures won’t give you the same rise and crust texture as higher heat. If 400°F is your max, one option is to start the pizza in a skillet (like cast iron) on the stovetop to get the bottom nice and crisp, then transfer it to the oven to finish and melt the cheese. I think it will be a good way to get around the lower oven temp. Let me know if you give it a try!
Viviane says
Thanks George for the response. I appreciate that however I ended up not making it. I am making it today May 20 because sometimes life interrupts so I’m going to do the 400. I don’t mind a soft crust the idea of cooking it on the stove a bit before is a great suggestion so now I have another question and I don’t know whether I can answer it. Ask it here but I’m going to attempt to. I am using a yeast that has the expiry date on the bag which I cannot read, but I do believe that it was expired so I tested it by letting it bloom and it did bloom so I went ahead and used it. I’m keeping my fingers crossed now so I have left it to sit to rise for an hour and my question is can One let it longer than an hour without causing any harm and if I only use half of the mixture, can I freeze the other half after the first rising I would love to hear your response. Thank you so much.
Kiley says
What do you do with the extra cup and 1/2 of flour? The ingredient list says 4 1/2 cups and the recipe says use 3 cups of flohr
George says
Hi Kiley! You’ll start by mixing 3 cups of flour with the salt, then add the yeast mixture. After that, gradually add the remaining flour (about 1 1/2 cups) as you mix and knead the dough. Depending on humidity and how your flour is measured, you may not need all of it (just add enough until the dough comes together into a soft, smooth ball that’s not too sticky). Hope that helps, and let me know if you have any other questions!
Rick says
Would this work in a cast iron skillet? It’s about 9” on bottom and about 10” at top.
George says
Hi, Rick! That’s a great question! I haven’t personally tested this dough in a cast-iron skillet yet, but here’s what I’d suggest.
If you’re using the skillet like a pizza stone and preheating it first, I’d recommend shaping the dough slightly smaller than the top diameter before carefully placing it in. In that case, it should bake fairly quickly at 475–500°F, probably around 10–13 minutes, depending on how thick you make it.
If you’re pressing the dough directly into the skillet and putting the whole thing into the oven cold, it will likely take longer since the cast iron needs time to heat up. You may also end up with a slightly softer bottom crust compared to the preheated method.
You could divide this dough into two thicker pizzas or three thinner ones, and a 9- to 10-inch skillet would be a great size for one portion.
If you try it, I’d love to hear how it turns out! I think that feedback would be super helpful! Thank you so much for such a great question!
Fee says
I was just wondering on the best baking instructions is for this. I love making homemade pizza but I normally get a pre-made dough because I don't have a mixer. So I'm really excited to try this out.
Kathy says
I made my own pizza sauce this past summer so thought I’d better make my own dough to go along with it. This recipe was the first I tried and it’s amazing, super easy and I’m able to split the finished dough into 4 separate pizzas. We like our crust thinner so it’s perfect!! I usually make 1 pizza with the dough and freeze the dough into 3 separate freezer bags for future dinners. Thanks so much for sharing this recipe!!
George says
Kathy, this made my day! Thank you so much for sharing this! I love that you made your own pizza sauce too, that’s next-level homemade pizza 🙌 Splitting the dough and freezing portions is exactly how I do it as well, especially for easy future dinners. I’m so happy this worked perfectly for your thin-crust preference. Thanks again for taking the time to leave such a thoughtful comment!
Geedster says
Unbelievably good. Followed the recipe exactly as written and it was perfect! I made a pepperoni pizza and drizzled some thyme-infused honey on it after baking and it was a show stopper. Thank you for bringing this recipe into my home. xx
George says
Thank you so much for your kind words and review!
Robert says
I've looked up a few pizza dough recipes. This one has great reviews and I will try it. Can I use instant yeast and why sugar?
George says
Hi Robert,
You can certainly use instant yeast. The sugar is added to feed the yeast. While the yeast can get sugar from the flour, adding a small amount directly to the water allows the yeast to start working immediately by consuming the sugar.
I hope this explanation is helpful!
Stephen from Fleetwood Lancashire says
Just made this dough for the first time and it looks great can't wait to try it as my first attempt at home. Made pizza
George says
Hi Stephen! Hope you enjoy your pizza 🙂
DeeDee says
Hello💜 I realize this recipe was posted just over 3 years ago. But I just had to comment. This recipe is Aweeeeeesome!! It turned out amazing. I had never made my own pizza dough, or even touched active yeast. I don’t own a stand-mixer, which made this by hand method; perfect for me. My family loved it. I planned on only making one of the pizzas, but it was ate so fast. So this recipe making two crusts was just what the family wanted. I can’t thank you enough for making homemade dough so easily accessible for anyone to make. This recipe is a true keeper.
George says
Hi DeeDee, thank you so much for your review and rating! I'm so happy to hear you enjoyed the recipe with your family 🙂
Frances Percy-Campbell says
Thank you first time making pizza dough. The recipe was very easy to follow and loved all the sidebars to look at when I started questioning myself.
George says
I am very happy to hear that my instructions were helpful! I really appreciate your rating and review 🙂
Mary Schultz says
Best pizza dough recipe! Love that I can make it without expensive equipment. Made a large pizza a few weeks ago and my family raved about it. Made a few more batches for a family pizza party tonight and love that I can make it a few days ahead. Thank you so much for a pizza dough recipe perfect for me.
George says
I am so happy you enjoyed the recipe, Mary! Thank you so much for your review!
Amanda Yates says
The whole family loves it! I am an amateur bread maker without a mixer and so far have not had great results until now. I read through the comments looking for answers to questions that might arise and began.
It’s delicious! I and the elders of my crew were shocked when the picky eater approved and asked for more. The picky eater was the first to taste so everyone else hurriedly grabbed a piece to taste what the picky eater had approved and it was given 5 stars from everyone. Thank you!
George says
Hello Amanda, I'm so happy to hear that! Thank you so much for your kind words and review!
Caitlyn says
No matter how long I kneed I can’t get the dough to be smooth. It breaks when I pull it. Don’t know what would cause that? I’m sure it’ll be yummy anyways!
George says
Hi Caitlyn,
If you knead the dough enough, it should be smooth and somewhat elastic. Maybe you can use bread flour in the future since it has higher gluten content? Hope it turns out okay!
Laura says
George, thank you for this recipe. It comes together so quick and cooks up to make perfect pizza every time. The only recipe I use for pizza dough now. Highly recommend this site and recipe. Five star all the way. I always use a combo of whole wheat and all purpose flour, and it is delicious my family is always asking to make it.
George says
Laura, thank you so much for the review and your kind words! I’m so happy to hear that you are enjoying this recipe with your family ❤️
Isabel Colon says
Made yummy pizza, thank you
George says
Thank you so much for your review! I'm glad you enjoyed the pizza, Isabel❤️
Christine Macaluso says
How many pizzas does this don’t make? Thin crust? Thick crust? 12 inch round 9 x 13?
George says
Hi Christine, I can make two large thin-crust pizzas that can fit on a 9x13 baking sheet. But if I were to make a thick crust, I'd say it would make two medium sizes. I hope this helps!
Amber says
I never leave comments about recipes but I like this recipe so much I wanted to let others know. This is not only easy but it always make a great pizza and I love that it makes enough for two pizzas. We eat one when I make initially make the dough and then freeze the other half and have a fast weeknight dinner when needed. Thank you for sharing!!
George says
Thank you so much for your kind words and review, Amber. I'm so happy you like the recipe!
SusanAnn Sheidy says
So sorry I just so my question answered on a previous question, as I said I am sooooooo nervous about making my own dough. Will let you know of the outcome or my breakdown.
George says
Hello! I'm sorry it took me a while to get back to you. You just need to give it a quick stir. If it doesn't seem like it is not dissolving, that's okay. If some of it just floats on top, that's okay too 🙂 I know it can be nerve-racking to make something new but I tend to view it as an exciting new experiment! Please let me know how it turns out!
SusanAnn Sheidy says
Do I stir the yeast in the water or let it sit on top. I am sooooooooooooo nervous about making my own dough!
LisaJane says
I love this recipe! I've been using it for around 4 months now and make pizza at least every other week, it tastes SO good and its so easy (+ really affordable!). I add Italian seasoning and roasted garlic to flavour the dough, it tastes freaking amazing so I'll never stop. Every time I have company over they ask for pizza lol. For softer crust I bake at 400° for 16min on a preheated pizza stone, we dont love crisp crust on fresh pizza so I don't do the higher temps for my family - and thats for 1/2 the dough the recipe makes. I will never buy pizza again if I have access to the ingredients and an oven because this is better than any pizza I've ever purchased in my life! Thank you for this recipe <3
George says
Hi LisaJane,
Thank you so much for your kind words and amazing tips on how to make this recipe to the next level!! I can’t wait to try the roasted garlic and Italian seasoning version with the lower baking temp!
I’m so happy to hear that you enjoy this recipe 😊😊
Sara in KCMO says
My dough was so wet, I added at least 1 more cup of flour and had to knead it for 30 minutes. It is snowing here today so I thought the air was humid enough. We’ll see how it turns out…
George says
Hi Sara, I'm sorry to hear that the dough came out so wet. If you are used to measuring flour the "correct way," then the dough will come out extremely wet. When I pack my flour into the measuring cup, I pack it in a way that you can see the indentation of my fingers on top of the packed flour. I hope it turns out okay.
Cori says
Can we freeze the dough after the first rise (olive oiled bowl and dough)? Or save to use for another day? Happy New Year and thanks for answering!
George says
Hi Cori, you can freeze the dough after the first rise. I like to put my dough in a freezer safe bag and get as much air out as possible. You can also save the dough for another day in the fridge as well. Thank you so much and happy New Year to you and your family!
Sarah says
That one star review is silly. I made this pizza dough to make breakfast pizza on it and it came out perfectly even though it was my first time. Super tasty! I’ll definitely keep using this recipe.
George says
Hi Sarah, that's so sweet of you. Thank you so much. I'm so glad the pizza dough recipe worked out great. Breakfast pizza sounds delicious! I really appreciate your kind words and review!
Keegan says
You forgot cooking times
George says
Hi Keegan!! Because the recipe is for making the dough itself, I didn’t include the cooking time.
But when I make my pizza using this recipe, I bake my pizza (after adding sauce and toppings) at 450 for 11 to 15 minutes. Hope this helps 😊
Diana says
Agreed…the one star review is silly..i halved the recipe and turned out perfect..i found i prefer to knead in my bowl as well when i make other breads..i watch a German bread baker on youtube and 80% of hers are done the same way..
George says
Hi, Diana. Thank you for trying out the recipe and am so happy to hear that it came out great! I really appreciate your kind words and review!
Lyn says
Do you stir the yeast into warm water or just sprinkle on top?
George says
Hi Lyn! I like to give it a quick stir. Some of the yeast will still float on top but that has never stopped it from blooming fully! Hope this helps! 🤗
Unknown says
How long do you cook the dough for
George says
Hello,
When I make my pizza using this recipe, I bake my pizza (after adding sauce and toppings) at 450 for 11 to 15 minutes until the crust looks golden brown and all the cheese melts . Hope this helps 😊
Haley Scenna says
Could I use this same dough for like cinnamon rolls or like hamburger buns? We made a pizza w it but there is only 2 of us so have so much dough left.
George says
Hi Haley,
You can freeze the dough for later use. It freezes beautifully and can be stored in the freezer for a couple of months! However, since cinnamon rolls and burger buns use different ingredients and are made with enriched dough, I wouldn’t recommend using this dough for those recipes.
I hope this helps!
Cheryl says
You could probably use for calzones though?
Temple Netherton Ashbaugh says
I've Made Your Recipe Twice ❣️ My Group of 5 Gives it a ⭐⭐⭐⭐⭐ Rating !! We Make Pepperoni & Bacon & Cheddar Pizza.Ive Also Made Garlic Cheese Bread😋
George says
I'm so happy to hear that you like the recipe! Garlic cheese bread sounds amazing! Thank you so much for your review!
Temple Netherton Ashbaugh says
I Actually Stirred the Yeast in & it Bloomed Perfectly 🍕