Learn how to make easy vegan kimchi fried rice that's bold, tangy, and packed with umami. This simple method delivers deep flavor every time.
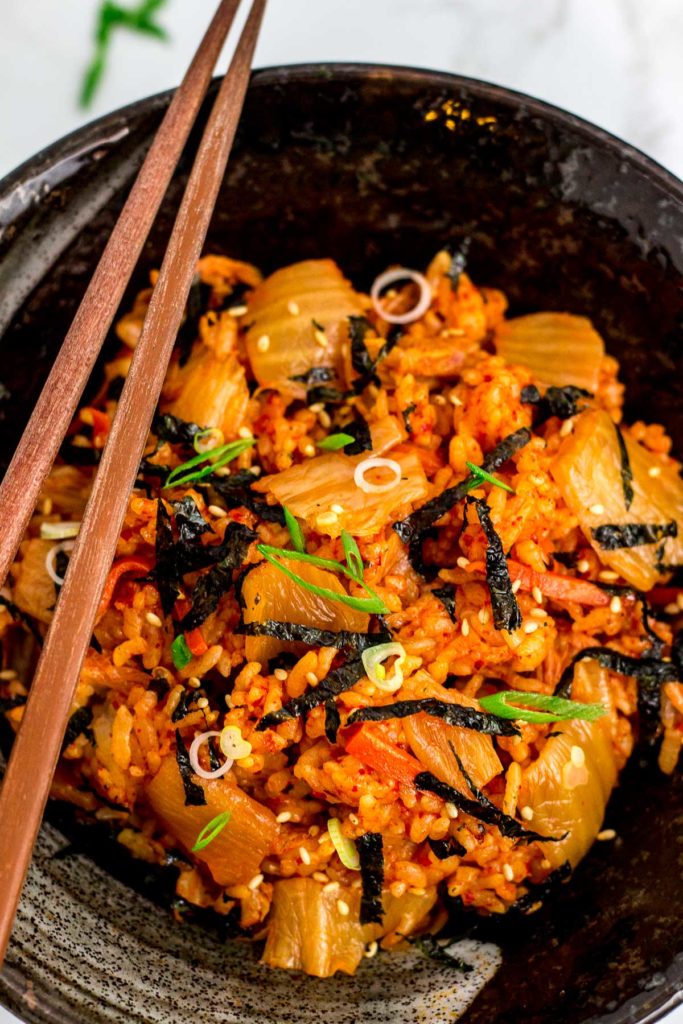
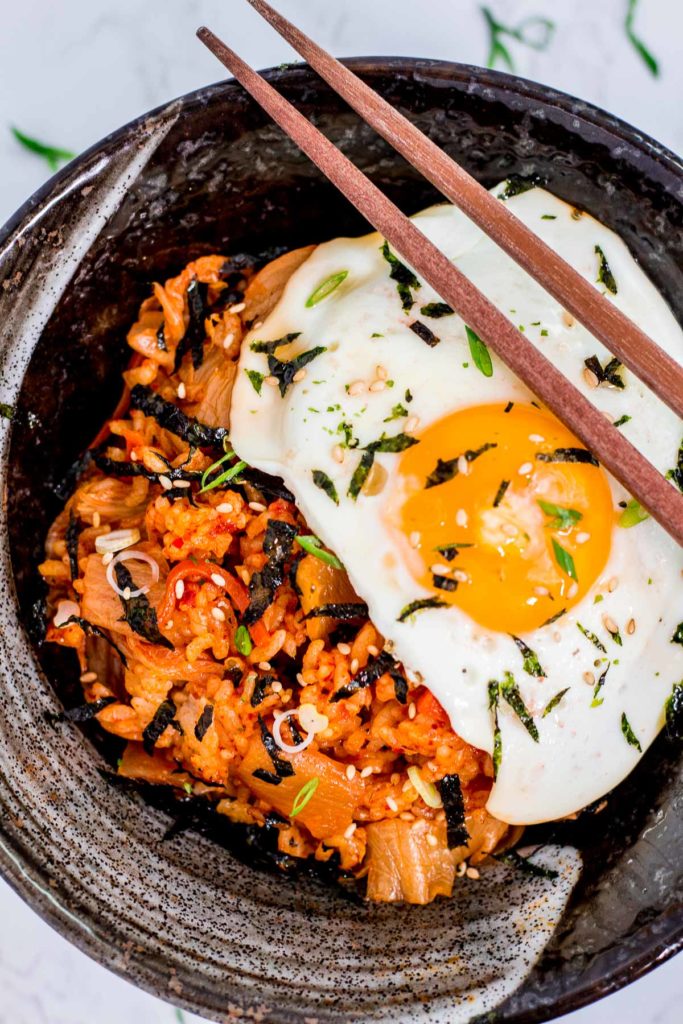
If someone asked me what my favorite kind of fried rice is, I wouldn’t hesitate to say kimchi fried rice (kimchi bokkeumbap). It’s bold, tangy, umami-packed, and so easy to throw together. I use my homemade vegan kimchi, but you can top it with a fried egg for a vegetarian version. That's the classic way you'll see it served in Korea. Once you learn this simple method, you can easily make your own version with your favorite vegetables, proteins, or toppings.
Jump to:
- What You’ll Love About It
- Ingredients for Vegan Kimchi Fried Rice
- How to Choose and Use Kimchi for Fried Rice
- How to Make Vegan Kimchi Fried Rice (Step by Step)
- Customize Your Vegan Kimchi Fried Rice
- Tips for the Best Texture and Leftovers
- Kimchi Fried Rice (Kimchi Bokkeumbap) FAQ
- Vegan Kimchi Fried Rice (Kimchi Bokkeumbap)
What You’ll Love About It
- Quick and easy: It is ready in just 20 minutes with pantry staples.
- Naturally vegan with my homemade vegan kimchi, or vegetarian with a fried egg.
- A great way to use up leftover rice and sour kimchi.
- Bold, tangy, and umami-packed, with plenty of ways to make it your own.
Ingredients for Vegan Kimchi Fried Rice
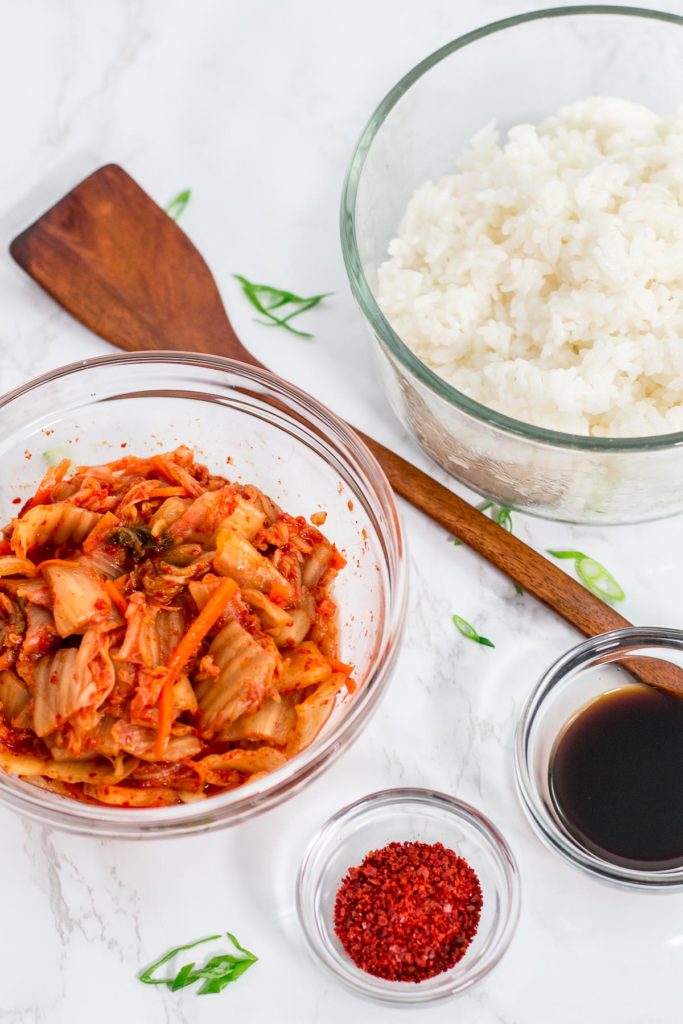
- Cooked rice (preferably day-old for the best texture)
- Vegan kimchi, chopped into bite-size pieces
- Soy sauce
- Korean red pepper flakes (gochugaru), optional
- Vegetarian mushroom or oyster sauce, optional (for extra umami)
- Neutral-tasting oil
- Garnishes: sesame oil, sliced green onions, seaweed flakes
- Fried egg (optional, for a vegetarian version)
You can learn more about Korean ingredients in my Korean Pantry Essentials guide to stock your kitchen with everything you need.
How to Choose and Use Kimchi for Fried Rice
The kimchi you use is the star of this dish, so its flavor really matters. Make sure to use vegan kimchi if you are vegan. I always use well-fermented kimchi for this dish as it gives the rice its deep, tangy, and bold flavor.
- If your kimchi isn’t sour enough: Leave it at room temperature for a day to let it ferment further. That usually does the trick. I don’t recommend adding vinegar — it can taste harsh and doesn’t give the same depth.
- If your kimchi is too sour: Add a pinch of sugar when cooking the rice to balance the sharpness. You can also add a little vegan butter for richness.
- Don’t skip the brine: The kimchi brine is full of salty, tangy flavor and helps season the rice perfectly. Add a spoonful or two right into the pan.
- Why I use gochugaru, not gochujang: Gochujang tends to make the rice sticky and gummy, especially if your rice isn’t dry enough. I prefer gochugaru for its clean heat and bright flavor that lets the kimchi shine.
How to Make Vegan Kimchi Fried Rice (Step by Step)
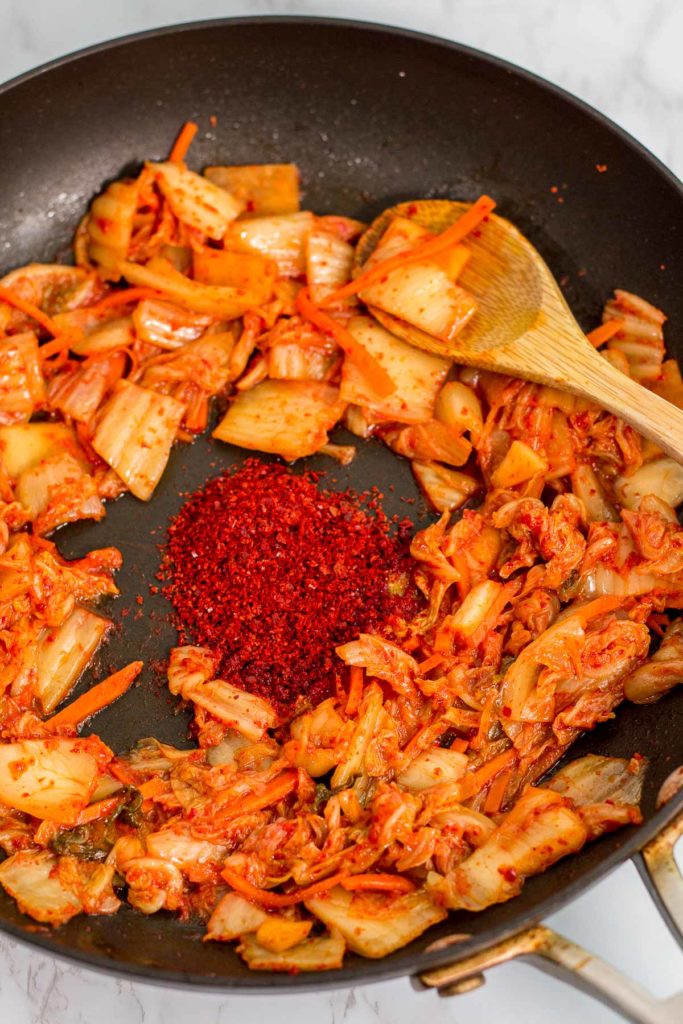
- Heat neutral oil in a large skillet over high heat. Fry the chopped kimchi for a couple of minutes until fragrant.
- Add gochugaru (if using) and cook for another minute.
- Pour in soy sauce and let it bubble for about a minute.
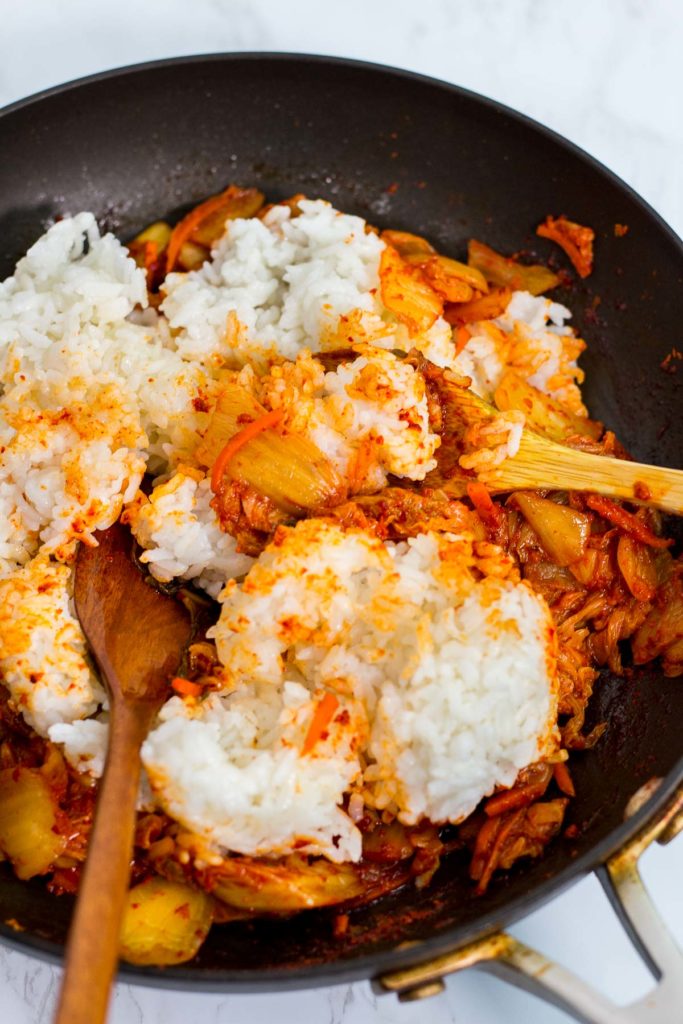
- Add day-old rice and vegetarian mushroom sauce. Lower heat to medium and mix until everything is well combined.
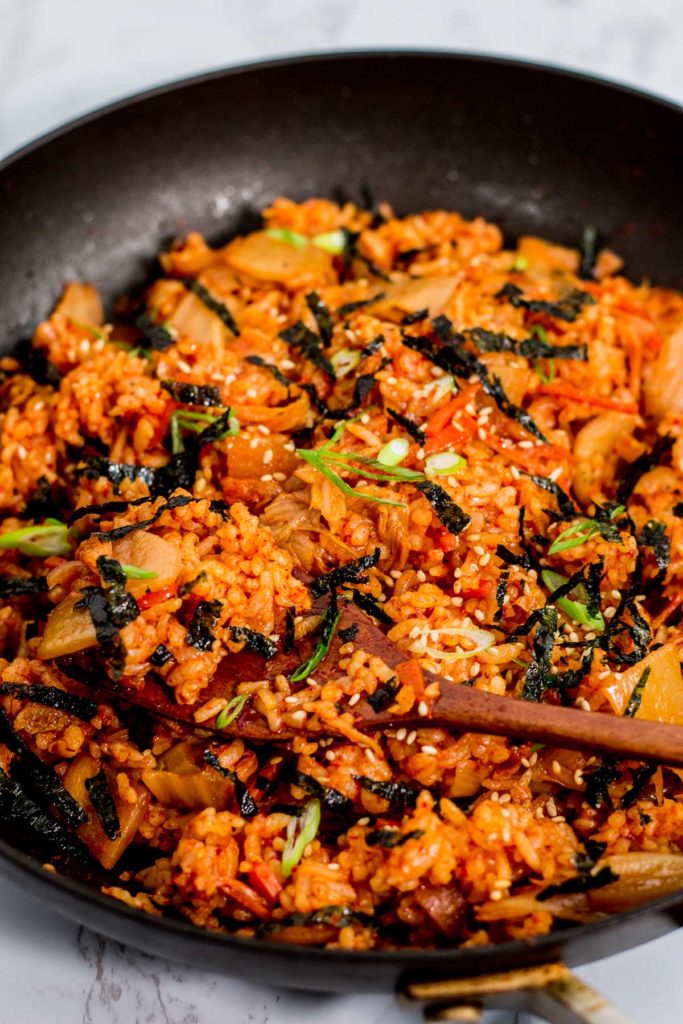
- Spread the rice evenly and let it sit for 1–2 minutes to crisp up. Stir and repeat if you want more crispy bits.
- Garnish with sesame oil, green onion, seaweed flakes, and a fried egg if desired.
Customize Your Vegan Kimchi Fried Rice
This is my base recipe, but you can easily adjust it to your taste. Here are some simple ways to customize the flavor, texture, and heat to make it your own.
| Target Flavor | Addition & Customization | Result |
| Umami Boost | Vegetarian mushroom sauce | Deeper, savory flavor |
| Rich | Vegan butter | Mellow and rich with a silky finish |
| More Robust Flavor | Extra kimchi brine | Kimchi-forward, more intense flavor |
| Spicy | More gochugaru | More heat and spice |
| Balanced Flavor | Pinch of sugar | Rounds out sharpness and mellows sourness |
| Filling | Vegan proteins: tofu, tempeh, or mushrooms | More satisfying and substantial |
| Healthy & Veggie Forward | Onion, green onion, corn, spinach, or pea | Added texture, freshness, and nutrition |
Tips for the Best Texture and Leftovers
- Use day-old rice: Cold, day-old rice has lower moisture, so it stays fluffy and develops crispy edges without clumping.
- Cook over high heat: Use a large pan, don’t overcrowd it, and let the rice sit for a few seconds at a time to build char and flavor.
- Storage: Store leftovers in an airtight container in the fridge for up to 4 days.
- Reheating: For best results, reheat in a hot pan with a little oil to revive the crispiness. You can also microwave it, but it will lose the crispy texture. But you can pair it with seasoned seaweed paper for added crunch.
Kimchi Fried Rice (Kimchi Bokkeumbap) FAQ
The most common reason is using freshly cooked, hot rice. Day-old rice is drier and can achieve a crisp texture. Overcrowding the pan or stirring too much can also make the rice break down and turn mushy.
Yes! Use a mild vegan kimchi, skip the gochugaru, and add just a little brine instead of a lot. You can also wash the kimchi, squeeze out the water, and use it. Adding vegan butter or sugar will also mellow out the flavor a bit.
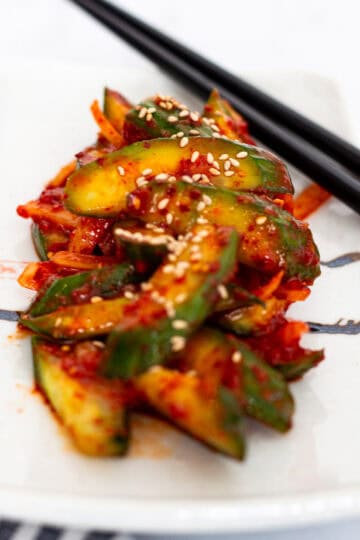
This fried rice is great on its own, but you can serve it with a simple Korean-style cucumber salad, roasted seaweed sheets, or even a bowl of miso soup on the side for a light meal.
I recommend using well-fermented kimchi for deep, tangy flavor. If your kimchi isn’t sour enough, leave it out at room temperature for a day to develop more sourness before using it.
If you’ve never made vegan kimchi fried rice at home, this is a great place to start. It’s quick, satisfying, and one of the easiest ways to use up leftover rice and kimchi. If you’re making it part of a cozy dinner for two, serve it with my vegan miso soup or doenjang jjigae to complete the meal. And if you’d like to make your own kimchi from scratch, check out my vegan kimchi recipe. You can also use extra kimchi in a vegan kimchi pancake or simple stir-fried kimchi. I’d love to hear how you make this kimchi bokkeumbap your own.
Vegan Kimchi Fried Rice (Kimchi Bokkeumbap)

Easy vegan kimchi fried rice with bold, tangy flavor and simple pantry ingredients. A quick Korean dinner for two is ready in 20 minutes.
- Prep Time: 5 minutes
- Cook Time: 10 minutes
- Total Time: 15 minutes
- Yield: Serves 2
- Category: Main
- Method: Stovetop
- Cuisine: Korean
- Diet: Vegan
Ingredients
-
1 tablespoon neutral-tasting oil
-
1 heaping cup well-fermented vegan kimchi, cut into bite-size pieces
-
2 teaspoons Korean red pepper flakes (gochugaru), optional
-
1 tablespoon soy sauce
-
2 cups day-old cooked rice
-
2 teaspoons vegetarian mushroom sauce
-
2–3 teaspoons sesame oil, for garnish
-
Sliced green onion and seaweed strips, for garnish
-
2 fried eggs (optional, for vegetarian version — skip for vegan)
Instructions
-
In a large skillet over high heat, add the neutral oil and fry the chopped kimchi for a couple of minutes until it becomes fragrant.
-
Add the Korean red pepper flakes (if using) and continue to fry the kimchi for another minute or two.
-
Pour in the soy sauce and let it bubble and cook down for about a minute to concentrate the flavor.
-
Add the day-old rice and vegetarian mushroom or oyster sauce. Turn the heat down to medium and use two wooden spoons to mix everything together until the rice is evenly coated and the kimchi mixture is well incorporated.
-
Spread the rice evenly across the skillet and let it sit undisturbed for a minute or two to develop some crispness. If you want more crispy bits, stir and repeat this process once more.
-
Garnish with a drizzle of sesame oil, sliced green onion, and seaweed flakes. For a vegetarian option, top your fried rice with a fried egg.
Notes
- I recommend using well-fermented vegan kimchi for the best bold, tangy flavor. You can find my Vegan Kimchi recipe on the blog if you’d like to make your own.
- Be sure to check out the sections above for more tips. These tips will help you tailor the dish to your taste and get the best results every time.


Mimi says
This is 2nd time I have made this recipe. So good, so fast! Thank you! I love it!
George says
I'm so happy to hear that, Mimi! Thank you so much for your review!